In this tutorial, you will explore the Pipeline functionality.
At the end of this tutorial, you will be able to:
-
Create a simple pipeline
-
Use a ‘Jenkinsfile’ in your project
-
Use manual input steps in a pipeline
Part 1 – Create a Simple Pipeline
We can create a pipeline job that includes the pipeline script in the job configuration, or the pipeline script can be put into a ‘Jenkinsfile’ that’s checked-in to version control.
To get a taste of the pipeline, we’ll start off with a very simple pipeline defined in the job configuration.
Prerequisite: We need to have a project in source control to check-out and build. For this example, we’ll be using the ‘SimpleGreeting’ project that cloned to a ‘Git’ repository at ‘C:\Software\repos\SimpleGreeting.git’.
For the above setup, refer to Part 2 of the blog Creating a Jenkins Job.
1. To connect to Jenkins, open Firefox and enter the following URL:
http://localhost:8080/
2. Login with your user/password.
3. Click on the New Item link.
![]() 4. Enter ‘SimpleGreetingPipeline‘ as the new item name, and select ‘Pipeline‘ as the item type.
4. Enter ‘SimpleGreetingPipeline‘ as the new item name, and select ‘Pipeline‘ as the item type.
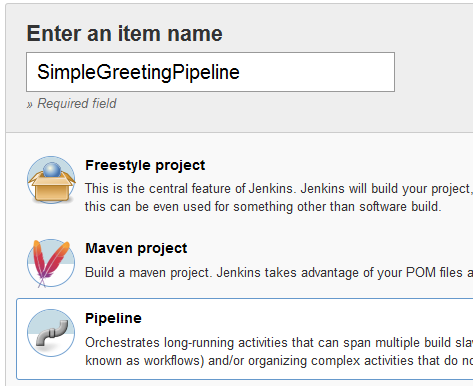 5. When the input looks as above, click on OK to create the new item.
6. Scroll down to the Pipeline section and enter the following in the Script text window.
node {
    stage 'Checkout'
    git url: 'C:\\Software\\repos\\SimpleGreeting.git'

    stage 'Maven build'
    bat 'mvn install'

    stage 'Archive Test Results'
    step([$class: 'JUnitResultArchiver',
      testResults: '**/target/surefire-reports/TEST-*.xml'])
}
This pipeline is divided into three stages. First, we checkout the project from our ‘git’ repository. Then we use the ‘bat’ command to run ‘mvn install’ as a Windows batch file. Finally, we use the ‘step’ command to utilize a step from a standard Jenkins plugin – in this case, the JUnitResultArchiver, to save and display the results of the unit tests.
All of the above is wrapped inside the ‘node’ command, to indicate that we want to run these commands in the context of a workspace running on one of Jenkins execution agents (or the master node if no agents are available).
7. Click on Save to save the changes and return to the project page.
8. Click on Build Now to start up a pipeline instance.
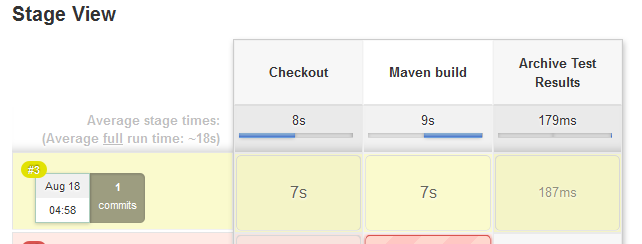
![]() 9. After a few moments, you should see the Stage View appear, and successive stages will appear as the build proceeds, until all three stages are completed.
9. After a few moments, you should see the Stage View appear, and successive stages will appear as the build proceeds, until all three stages are completed.
 Part 2 – Pipeline Definition in a ‘Jenkinsfile’

For simple pipelines or experimentation, it’s convenient to define the pipeline script in the web interface. But one of the common themes of modern software development is “If it isn’t in version control, it didn’t happen”. The pipeline definition is no different, especially as you build more and more complex pipelines.
You can define the pipeline in a special file that is checked out from version control. There are several advantages to doing this. First, of course, is that the script is version-controlled. Second, we can edit the script with the editor or IDE of our choice before checking it in to version control. In addition, we can employ the same kind of “SCM Polling” that we would use in a more traditional Jenkins job.
In the following steps, we’ll create a Jenkinsfile and create a pipeline job that uses it.
1. Open the Eclipse editor. If this lab is completed in the normal sequence, you should have the ‘SimpleGreeting’ project already in Eclipse’s workspace. If not, check out the project from version control (consult your instructor for directions if necessary).
2. In the Project Explorer, right-click on the root node of the SimpleGreeting project, and then select New → File.
3. Enter ‘Jenkinsfile‘ as the file name.
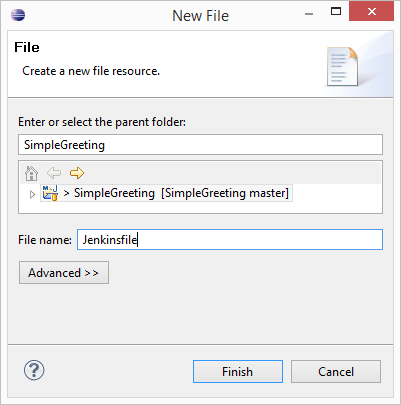 4. Click Finish to create the new file.
5. Enter the following text into the new file (Note: this is the same script that we used above, so you could copy/paste it from the Jenkins Web UI if you want to avoid some typing):
node {
    stage 'Checkout'
    git url: 'C:\\Software\\repos\\SimpleGreeting.git'

    stage 'Maven build'
    bat 'mvn install'

    stage 'Archive Test Results'
    step([$class: 'JUnitResultArchiver',
      testResults: '**/target/surefire-reports/TEST-*.xml'])
}
6. Save the Jenkinsfile by selecting File → Save from the main menu, or by hitting Ctrl-S.
7. In the Project Explorer, right-click on the SimpleGreeting node, and then select Team → Commit…
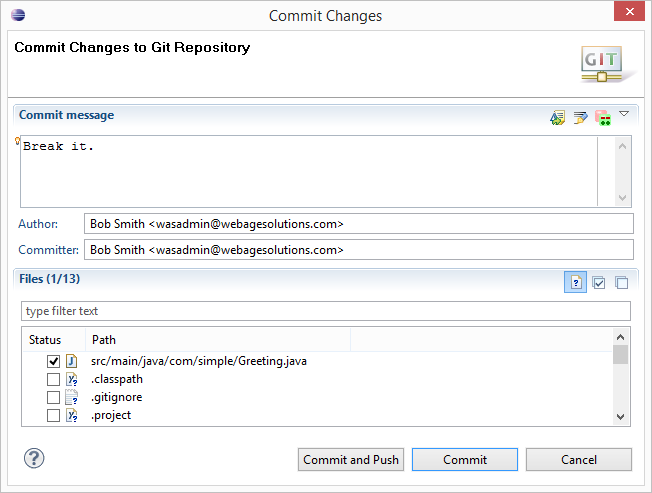
8. Eclipse will display the Commit Changes dialog. Click the check box next to Jenkinsfile (to include that file in the commit) and enter a commit message.
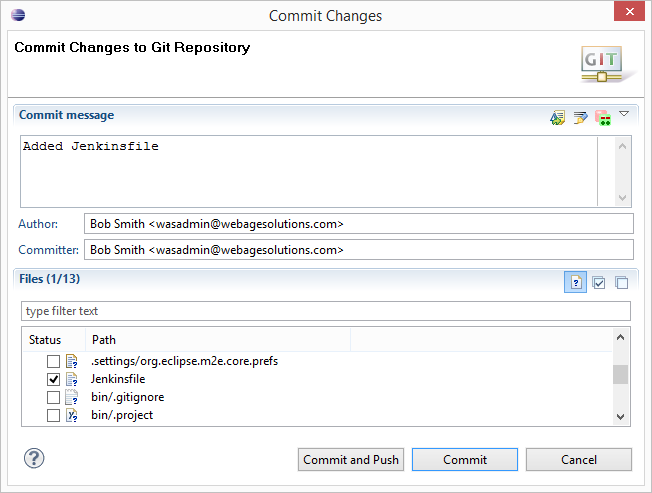 9. Click Commit and Push, and then click OK to dismiss the status dialog.
Now we have a Jenkinsfile in our project, to define the pipeline. Next, we need to create a Jenkins job to use that pipeline.
10. In the Jenkins user interface, navigate to the root page, and then click on New Item.
11. Enter ‘SimpleGreetingPipelineFromGit‘ as the name of the new item, and select Pipeline as the item type.
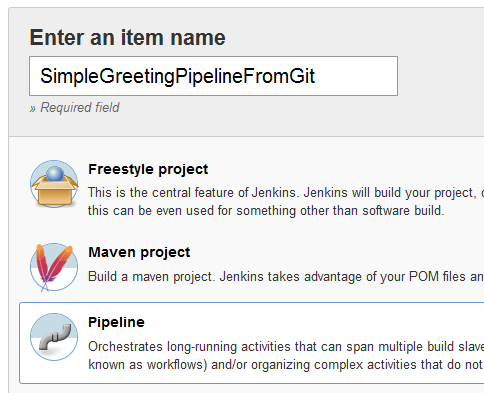 12. Click OK to create the new item.
13. Scroll down to the Build Triggers section.
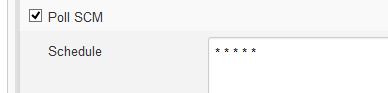
14. Click on Poll SCM and enter ‘* * * * *’ as the polling schedule. This entry will cause Jenkins to poll once per minute.
 15. Scroll down to the Pipeline section, and change the Definition entry to ‘Pipeline Script from SCM’
16. Enter the following:
SCM: Git
Repository URL: C:\Software\repos\SimpleGreeting.git
(Press the tab key)
17. The Pipeline section should look similar to:
 18. Click Save to save the new configuration.
19. Click Build Now to launch the pipeline.
20. You should see the pipeline execute, similar to the previous section.
Part 3 – Try out a Failing Build
The pipeline that we’ve defined so far appears to work perfectly. But we haven’t tested it with a build that fails. In the following steps, we’ll insert a test failure and see what happens to our pipeline.
1. In Eclipse, go to the Project Explorer and locate the file ‘Greeting.java’. It will be under src/main/java in the package ‘com.simple’.
2. Open ‘Greeting.java’.
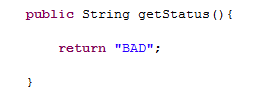
3. Locate the line that reads ‘return “GOOD”;’. Change it to read ‘return “BAD”;’
 4. Save the file.
5. In the Project Explorer, right-click on Greeting.java and then select Team → Commit… (This is a shortcut for committing a single file).
6. Enter an appropriate commit message and then click Commit and Push.
 7. Click OK in the results box, to close it.
8. Switch back to Jenkins.
9. In a minute or so, you should see a build launched automatically. Jenkins has picked up the change in the ‘Git’ repository and initiated a build. If nothing happens then click Build Now.
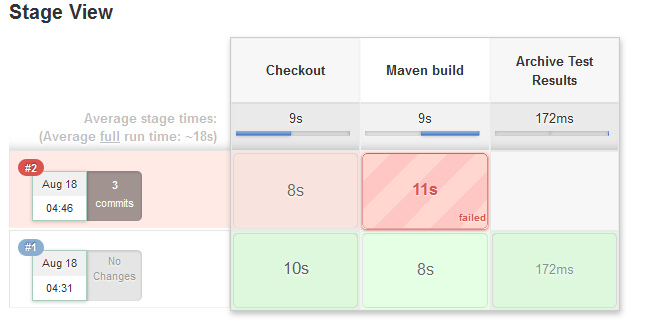 This time, the results are a little different. The ‘Maven Build’ stage is showing a failure, and the ‘Archive Test Results’ stage was never executed.
What’s happened is that the unit tests have failed, and Maven exited with a non-zero result code because of the failure. As a result, the rest of the pipeline was canceled. This behavior probably isn’t what you want or what you expect in most cases. We’d like to go ahead and archive the test results, even when there’s a failure. That way, we can see the trend including failed tests.
The solution here is to add a command-line parameter to the Maven invocation. If we add ‘-Dmaven.test.failure.ignore’ to the Maven command line, then Maven will continue with the build even if the tests fail.
10. Go back to Eclipse and open the ‘Jenkinsfile‘ if necessary.
11. Alter the ‘bat “mvn…” line to read as follows:
bat 'mvn -Dmaven.test.failure.ignore install'12. Save the ‘Jenkinsfile’. Commit and push the changes using the same technique as above.
13. After a minute or so, you should see a new Pipeline instance launched. If nothing happens then click Build Now.
 This time, the pipeline runs to completion, and the test results are archived as expected. Notice that the build is now flagged as ‘unstable’ (indicated by the yellow color and the icon). The JUnit archiver noticed the failures and flagged the build unstable, even though Maven exited normally.
Part 4 – Add a Manual Approval Step
One of the interesting features of the Pipeline functionality is that we can include manual steps. This is very useful when we’re implementing a continuous deployment pipeline. For example, we can include a manual approval step (or any other data collection) for cases like ‘User Acceptance Testing’ that might not be fully automated.
In the steps below, we’ll add a manual step before a simulated deployment.
1. Go to ‘Eclipse’ and open the ‘Jenkinsfile‘ if necessary.
2. Add the following to the end of the file after the closing }:
stage 'User Acceptance Test'
def response= input message: 'Is this build good to go?',
 parameters: [choice(choices: 'Yes\nNo',
 description: '', name: 'Pass')]
if(response=="Yes") {
 node {
  stage 'Deploy'
  bat 'mvn -Dmaven.test.failure.ignore install'
 }
}
This portion of the script creates a new stage called ‘User Acceptance Test’, then executes an ‘input’ operation to gather input from the user. If the result is ‘Yes’, the script executes a deploy operation in a new ‘node’ step. (In this case, we’re repeating the ‘mvn install’ that we did previously. Only because we don’t actually have a deployment repository setup)
3. Save and commit ‘Jenkinsfile’ as previously.
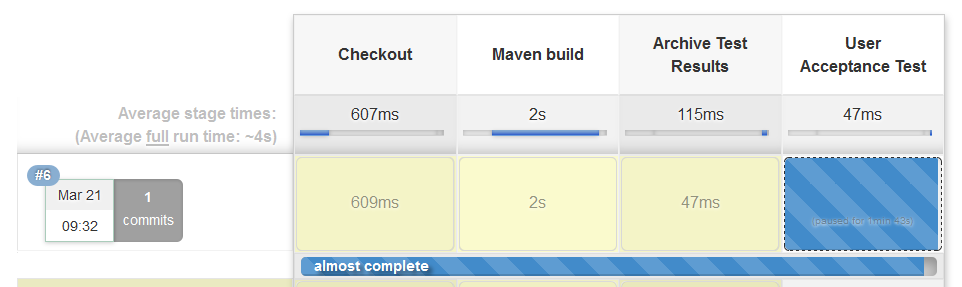
When the pipeline executes, watch for a “paused” stage called ‘User Acceptance Test”. If you move your mouse over this step, you’ll be able to select “Yes” or “No”.
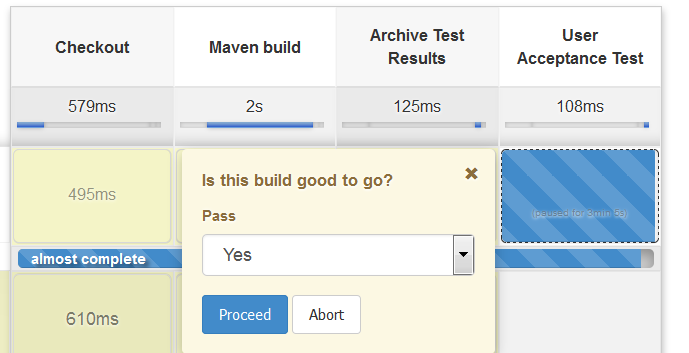
 4. Move your mouse over the ‘User Acceptance Test’ step, select Yes and click Proceed.
 You should see the job run to completion.
5. Run the pipeline again (click Build Now), but this time, select No on the ‘User Acceptance Test’ and click Proceed, you’ll see that the pipeline exits early and doesn’t run the ‘deploy’ stage.
 What’s happened is that the final ‘Deploy’ stage was only executed when we indicated that the ‘User Acceptance Test’ had passed.
6. Close all.
Part 5 – Review
In this tutorial, we explored the Pipeline functionality in Jenkins. We built a simple pipeline in the Jenkins web UI, and then used a ‘Jenkinsfile’ in the project. Lastly, we explored how to gather user input, and then take different build actions based on that user input.