In this tutorial, you will create and build a job in Jenkins.
Jenkins supports several different types of build jobs. The two most commonly-used are the freestyle builds and the Maven 2/3 builds. The freestyle projects allow you to configure just about any sort of build job, they are highly flexible and very configurable. The Maven 2/3 builds understand the Maven project structure, and can use this to let you set up Maven build jobs with less effort and a few extra features.
At the end of this tutorial, you will be able to:
-
Create a Jenkins Job that accesses a Git repository.
Part 1 – Enable Jenkins’ Maven Plugin
1. Go to the Jenkins console:
http://localhost:8080
2. Login using your user and password.
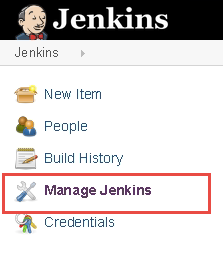
3. Click on the Manage Jenkins link
4. Ignore any message regarding an update.
5. Click on Manage Plugins

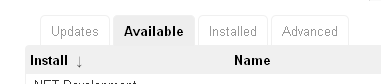
6. Click on the Available tab.
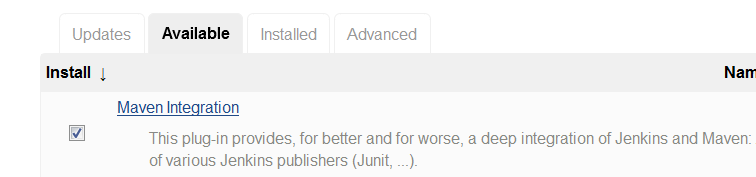
7. In the filter box at the top-right of the window, enter ‘Maven Integration‘. Note: Don’t hit Return!

8. Entering the filter text will narrow down the available plugins a little. Scroll down to find the ‘Maven Integration‘ listing, and click on the check box next to it.
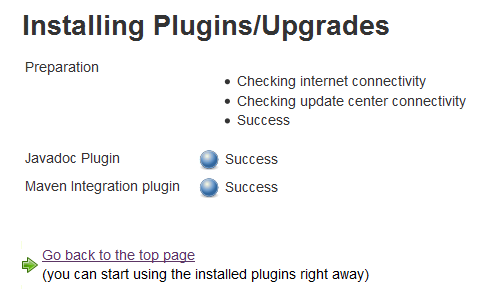
9. Click Install Without Restart.

10. Click Go back to the top page.
Part 2 – Create a Git Repository
As a distributed version control system, Git works by moving changes between different repositories. Any repository apart from the one you’re currently working in is called a “remote” repository. Git doesn’t differentiate between remote repositories that reside on different machines and remote repositories on the same machine. They’re all remote repositories as far as Git is concerned. In this lab, we’re going to start from a source tree, create a local repository in the source tree, and then clone it to a local repository. Then we’ll create a Jenkins job that pulls the source files from that remote repository. Finally, we’ll make some changes to the original files, commit them and push them to the repository, showing that Jenkins automatically picks up the changes.
1.Download the files Create A Jenkins Job and extract to C:\LabFiles\Create A Jenkins Job
2.Open to the folder C:\LabFiles\Create A Jenkins Job\SimpleGreeting.
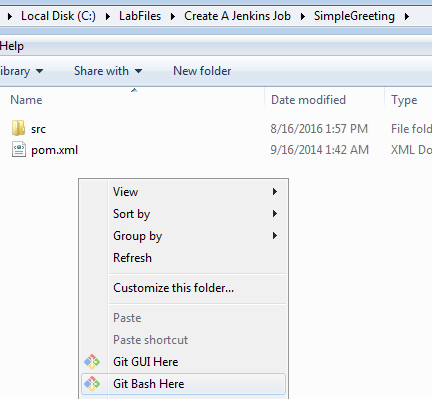
3. Right click in the empty area and select Git Bash Here. The Git command prompt will open.
3. Enter the following command:
ls


4. Enter the following lines. Press enter after each line:
git config --global user.email "wasadmin@localhost"git config --global user.name "Bob Smith"
The lines above are actually part of the initial configuration of Git. Because of Git’s distributed nature, the user’s identity is included with every commit as part of the commit data. So we have to tell Git who we are before we’ll be able to commit any code.
5. Enter the following lines to actually create the Git repository:
git init
git add .
git commit -m "Initial Commit"
The above lines create a git repository in the current directory (which will be C:\LabFiles\Create a Jenkins Job\SimpleGreeting), add all the files to the current commit set (or ‘index’ in git parlance), then actually performs the commit.
6. Enter the following, to create a folder called repos under the C:\Software folder.
mkdir /c/Software/repos7. Enter the following to clone the current Git repository into a new remote repository.
git clone --bar . /c/Software/repos/SimpleGreeting.git

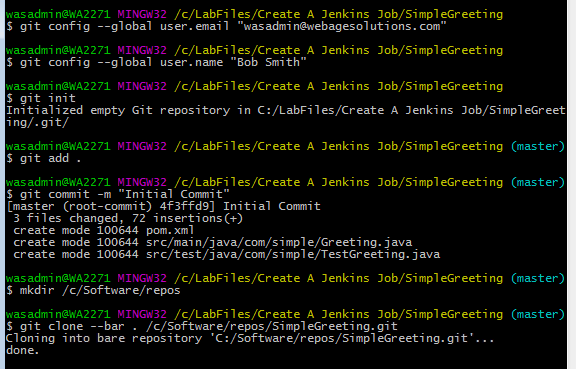
At this point, we have a “remote” Git repository in the folder C:\Software\repos\SimpleGreeting.git. Jenkins will be quite happy to pull the source files for a job from this repo.
Part 3 – Configure Git
1. Go to Jenkins home.
http://localhost:8080
2. Click Manage Jenkins.
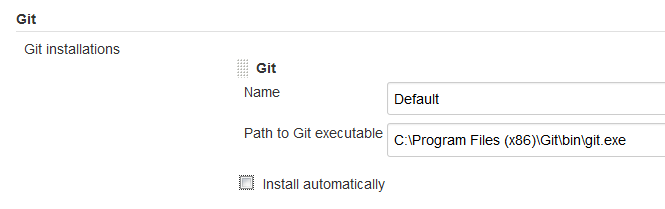
3. Click Global Tool Configuration.
4. Scroll to the Git section.
5. Make sure git path is the right one, if not fix it and save. (Your path could be different)

Part 4 – Create the Jenkins Job
1. Go to the Jenkins home.
2. Click on the New Item link.


3. Enter SimpleGreeting for the project name.
4. Select Maven Project as the project type.

5. Click OK, to add a new job.
After the job is created, you will be on the job configuration page.
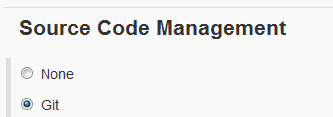
6. Scroll down to the Source Code Management section and then select Git.
7. Under Repositories, enter C:\Software\repos\SimpleGreeting.git and press tab key.

8. Click Save.
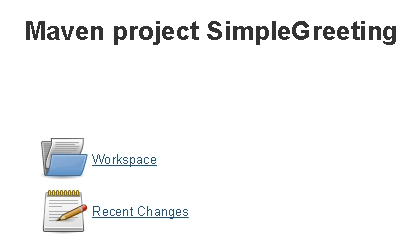
9. You will see the Job screen. Click Workspace.
10. Click Build Now.
You should see the build in progress in the Build History area.

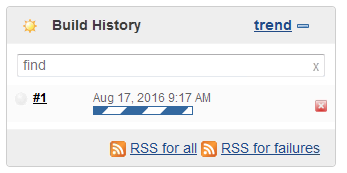
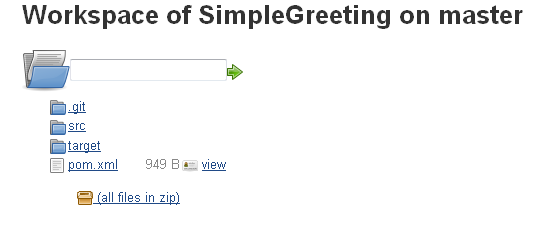
11. After a few seconds the build will complete, the progress bar will stop. Click on Workspace.

You will see that the directory is populated with the source code for our project.
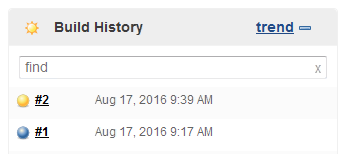
12. Find the Build History box, and click on the ‘time’ value for the most recent build. You should see that the build was successful.
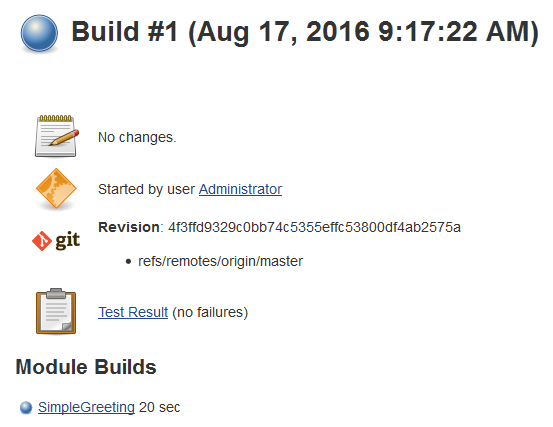
13. Click the Console Output from the left menu.

14. At the end of the console you will also see the build success and successful build finish.
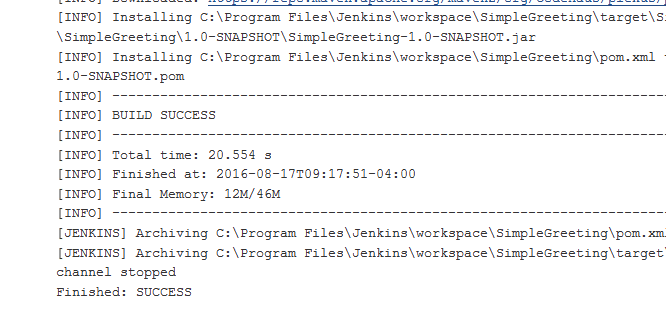 You have created a project and built it successfully.
Part 5 – Enable Polling on the Repository
So far, we have created a Jenkins job that pulls a fresh copy of the source tree prior to building. But we triggered the build manually. In most cases, we would like to have the build triggered automatically whenever a developer makes changes to the source code in the version control system.
1. In the Jenkins web application, navigate to the SimpleGreeting project. You can probably find the project in the breadcrumb trail near the top of the window. Alternately, go to the Jenkins home page and then click on the project.
2. Click the Configure link.
3. Scroll down to find the Build Triggers section.
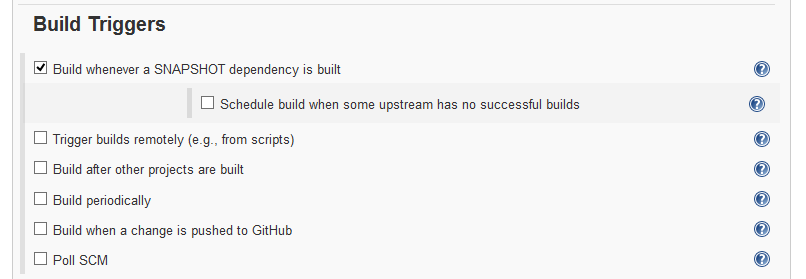
4. Click on the check box next to Poll SCM, and then enter ‘* * * * *’ into the Schedule text box.
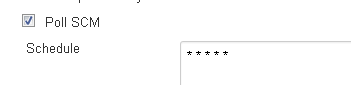
Note: The above schedule sets up a poll every minute. In a production scenario, that’s a higher frequency than we need, and it can cause unnecessary load on the repository server and on the Jenkins server. You’ll probably want to use a more reasonable schedule – perhaps every 15 minutes. That would be ‘H/15 * * * *’ in the schedule box.
5. Click Save.
Part 6 – Import the Project into Eclipse
In order to make changes to the source code, we’ll clone a copy of the Git repository into an Eclipse project.
1. If eclipse was closed then start Eclipse by running C:\Software\eclipse\eclipse.exe and use C:\Workspace as Workspace.
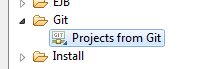
2. From the main menu, select File → Import…
3. Select Git → Projects from Git.
4. Click Next.
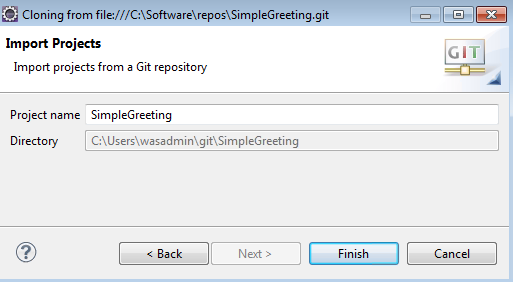
5. Select Clone URI and then click Next.
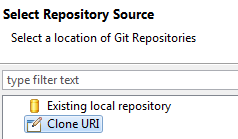
You might think that ‘Existing local repository’ would be the right choice, since we’re cloning from a folder on the same machine. Eclipse, however, expects a “local repository” to be a working directory, not a bare repository. On the other hand, Jenkins will complain if we try to get source code from a repository with a working copy. So the correct thing is to have Jenkins pull from a bare repository, and use Clone URI to have Eclipse import the project from the bare repository.
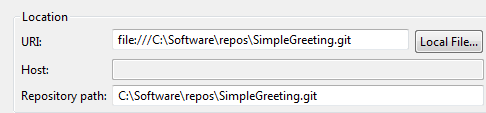
6. Click on Local File… and then navigate to C:\Software\repos\SimpleGreeting.git
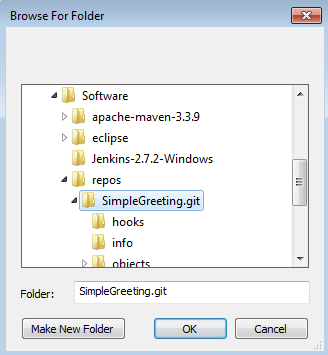 7. Click OK.
8. Back in the Import Projects dialog, click Next.
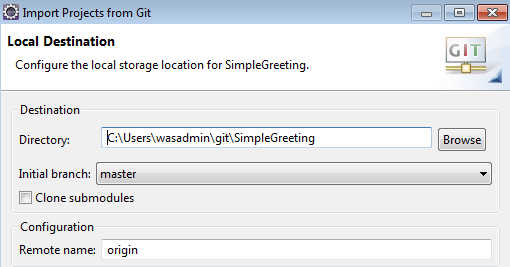
9. Click Next to accept the default ‘master’ branch.

10. In the Local Destination pane, leave the defaults and click Next.
11. Select Import as a General Project and click Next.

12. Click Finish.
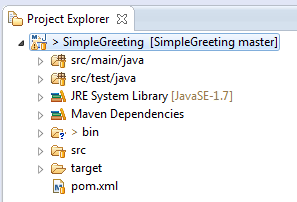
13. You should see the new project in the Project Explorer, expand it.

At this point, we could go ahead and edit the files, but Eclipse doesn’t understand the project’s layout. Let’s tell Eclipse what we know – that this project is built using Apache Maven.
14. Right-click on the SimpleGreeting project in the Project Explorer, and then select Configure → Convert to Maven Project.

15. After few seconds, you should now see the project represented as a Maven project in the Project Explorer.
Part 7 – Make Changes and Trigger a Build
The project that we used as a sample consists of a basic “Hello World” style application, and a unit test for that application. In this section, we’ll alter the core application so it fails the test, and then we’ll see how that failure appears in Jenkins.
1. In the Project Explorer, expand the src/main/java tree node.
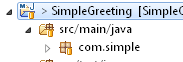
2. Expand the com.simple package to reveal the Greeting.java file.
![]()
3. Double-click on Greeting.java to open the file.
4. Find the line that says ‘return “GOOD”;’. Edit the line to read ‘return “BAD”;’

5. Save the file by pressing Ctrl-S or selecting File → Save.
Now we’ve edited the local file. The way Git works is that we’ll first ‘commit’ the file to the local repository, and then we’ll ‘push’ the changes to the upstream repository. That’s the same repository that Jenkins is reading from. Eclipse has a short-cut button that will commit and push at the same time.
6. Right-click on SimpleGreeting in the Project Explorer and then select Team → Commit…
7. Enter a few words as a commit message, and then click Commit and Push.
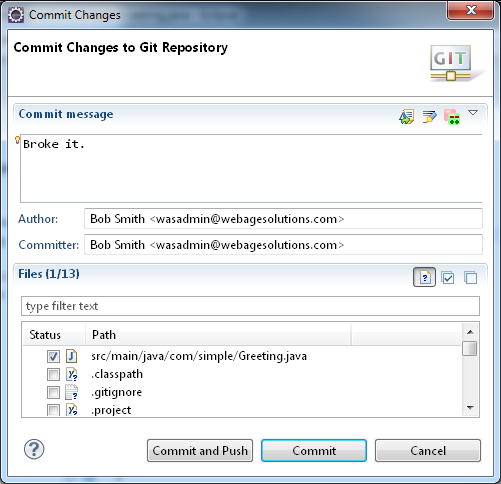
8. Click OK in the status dialog that pops up.
9. Now, flip back to the web browser window that we had Jenkins running in. If you happen to have closed it, open a new browser window and navigate to http://localhost:8080/SimpleGreeting. After a few seconds, you should see a new build start up. You can launch a new build if it’s taking too long.
10. If you refresh the page, you should see that there is now a ‘Test Result Trend’ graph that shows we have a new test failure.
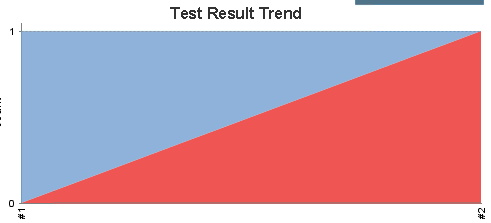
What happened is that we pushed the source code change to the Git repository that Jenkins is reading from. Jenkins is continually polling the repository to look for changes. When it saw that a new commit had been performed, Jenkins checked out a fresh copy of the source code and performed a build. Since Maven automatically runs the unit tests as part of a build, the unit test was run. It failed, and the failure results were logged.
Part 8 – Fix the Unit Test Failure
1. Back in eclipse, edit the file Greeting.java so that the class once again returns ‘GOOD’.
 2. As above, save, commit and push the change.
3. Watch the Jenkins web browser window. After a minute or two you should see the build start automatically or you can click Build now, when the build is done then refresh the page.
4. Close all.
Part 9 – Review
In this tutorial, you learned
-
How to Set-up a set of distributed Git repositories
-
How to create a Jenkins Job that reads from a Git repository
-
How to configure Jenkins to build automatically on source code changes.