This tutorial is adapted from Web Age course Snowflake Cloud Data Platform from the Ground Up Training.
In this tutorial, you will familiarize yourself with the Snowflake Web UI (a.k.a Web Portal, Snowflake Manager, and Snowflake Console).
Snowflake Web UI’s documentation page is located at https://docs.snowflake.com/en/user-guide/snowflake-manager.html
Part 1 – Sign in to Snowflake Web UI
1. Using your credentials, sign in to the Snowflake Web Portal.
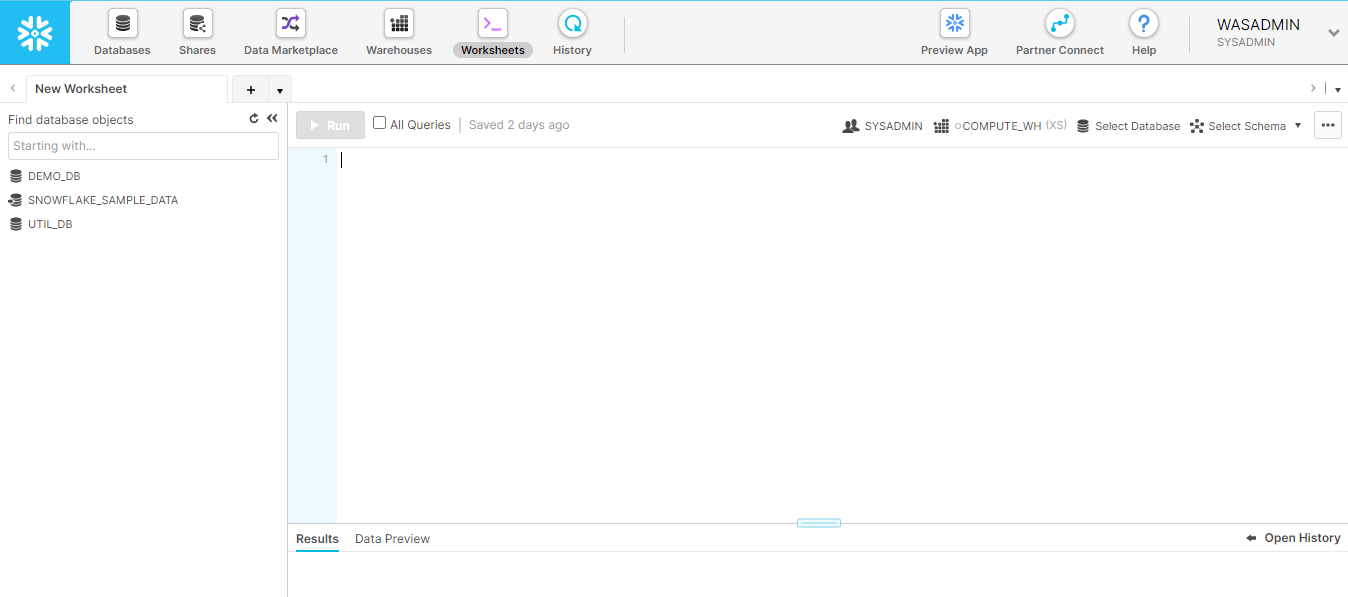
Upon successful sign-in, you will be placed on the landing page shown below.
 Your user is associated with the SYSADMIN (default) role which allows you to perform most of the regular development in the Snowflake environment. The SYSADMIN role is, however, not what is usually known as the “root” role — this role is delegated to the ACCOUNTADMIN role. You can switch to the ACCOUNTADMIN role and elevate your account privileges if needed.
2. Click the down arrow next to your user name in the top right-hand corner of the Web UI; a configuration dialog will appear.
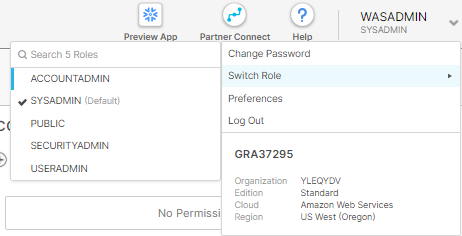
Here you can switch your role to ACCOUNTADMIN.
Also, notice the account name — GRA37295 shown here (yours will be different) — that you will be required to provide when working in the SnowSQL labs.
Part 2 – Worksheets
As you can see, currently you are in the Worksheets section of the Web UI with a new worksheet tab open ready to accept your commands. You can open and work in multiple worksheet tabs similar to what you can do in Microsoft Excel.
1. Click SYSADMIN in the worksheet’s information bar to see the available configuration options for your worksheet.
In the dialog popup that opens, you can see the following configuration properties (pre-populated with some defaults) here:
-
The Warehouse name and its size
-
XS stands for the extra-small size.
-
-
The Database
-
The Database’s schema
-
The Role (the Change link)
The changes you do in the configuration dialog are automatically reflected in the information bar when you close the dialog.
 Warning: Keep the size of the compute component of your warehouse X-Small (which will cost you 1 credit/hour) to prevent exceeding your trial period due to incurring charges beyond the allocated $400.
In worksheets, you can perform the following tasks:
-
Enter and submit SQL queries
-
Load and execute Snow SQL scripts
-
Perform DDL and DML operation
-
View the query results side-by-side as your queries/operations complete
-
Open multiple worksheets in different tabs configured with their own separate sessions
-
Export the result of a selected statement (if the result is still available)
Part 3 – The Database UI Section
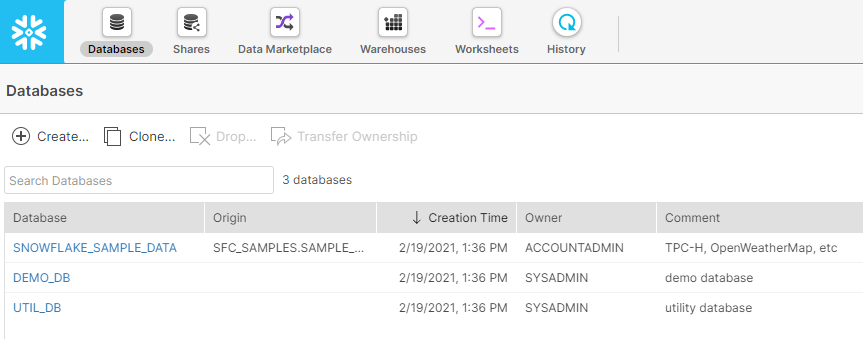
1. Click the Databases icon in the upper left-hand corner of the Web UI.
You should see the list of databases that currently exist in your environment.
Notice the database owners in the Owner column.
Part 4 – Shares
On this page, nothing is available for viewing to users in the SYSADMIN role, except for the message that says: “Secure Shares enable you to consume data being shared with your organization and also provide data to others. Contact your account administrator to get access.”

You should be in the ACCOUNTADMIN role (that’s what the Contact your account administrator to get access message means) to see some inbound and outbound (secure) shares.
Part 5 – Data Marketplace
On this page, you can look for external datasets that are offered by third parties and that can be used to add value to your data projects.
Part 6 – Warehouses
In this UI section, you can access the virtual warehouses either created by you or to which you have access permissions. Subject to the required permissions, you can perform the following tasks in this page:
-
Create or drop a warehouse.
-
Suspend or resume a warehouse.
-
Configure a warehouse.
-
Transfer ownership of a warehouse to a different role.
 Part 7 – History

This page lists the past queries issued in the last 14 days executed be it from SnowSQL or other SQL clients.
This UI section offers search filtering options for narrowing down potentially large lists of previously executed queries. Below is a sample search result of queries with runtimes exceeding 2 seconds:
 The following query criteria can be used for filtering:
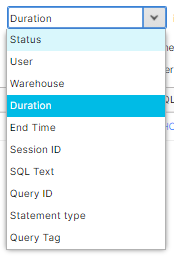 You can combine multiple filters to further narrow down the search space.
The search results are sortable in ascending and descending order. You can further customize the viewable column by unchecking the columns you are not interested in by clicking the column headers.
 Note that the query results are only available for a 24-hour period and that this is a not configurable limit.
Part 8 – The Preview App
As of the time of writing this lab, Snowflake UI is migrating to the new web interface that is accessible via the Preview App icon in the toolbar.
 The new interface comprises Snowflake’s next-generation Worksheets and Dashboards already enabled for your account.
1. Click Preview App and provide your Snowflake login credentials to sign into the new UI.
2. In the Ready to start using Worksheets and Dashboards? dialog, click Enable Worksheets and Dashboards
Wait for a couple of seconds for the new UI to initialize.
You will be prompted with a dialog to import your existing worksheets from the Classic Console; you can start a new worksheet as well by clicking the + Worksheet in the top right-hand corner of the page.
Quickly review other navigable options in the right-hand navigation pane, like Dashboards, Data, etc.
3. Click the down arrow icon next to your name in the upper left-hand corner of the page and select Sign Out
4. Close the browser tab where the new UI was displayed.
You should be placed back in the “Classic Console” browser tab.
Part 9 – Review
In this tutorial, you learned how to navigate the Snowflake Web UI and the supported capabilities.