In this tutorial, you will create a React application that uses React Hooks to manage state and handle activities. Please refer to the tutorial Setting Up a React Environment to set up a development environment for React before you start working on this tutorial.
Part 1 – React Development Environment
For this tutorial, we will be using a node.js based utility named “create-react-app” to create the development setup with the following capabilities:
-
ES6 & JSX Transpilation.
-
Module export/import support.
-
WebPack based development server.
-
Auto updating of the application in the browser.
Note that create-react-app will not work with earlier versions of node.js or npm.
1. Open a command prompt . Create C:\ReactWork directory and navigate to the C:\ReactWork directory.
2. Check the version of node.
node --version
The node version needs to be 8.10 or greater. If it is not then you need install a new version that complies with this requirement before going further.
check the version of npm.
npm --version
The npm version needs to be 5.6 or greater. If it is not then you need install a new version that complies with this requirement before going further.
3. We will use the ‘npx’ utility installed along with node which allows us to run create-react-app without first installing it on the local machine.
npx create-react-app react-hooks-app
This command may take several minutes to complete.
The command will create a 'react-hooks-app' directory under ReactWork
4. Navigate into the new directory
cd react-hooks-app
5. Run the application with the following command:
npm start
This starts the development server as well as ES6 /JSX transpilation. The transpilation and server are setup in watch mode which means that they are triggered automatically when files are saved. A browser window displaying the app is also opened automatically. The url being http://localhost:3000.
6. Wait for the process to fully start up and then check out the browser window. It should show the following:
 Part 2 – Display a List of Articles
In this part you will create a React component that displays a list of articles.
1. Edit the \react-hooks-app\src\App.js file and replace its contents with the following and then save the file:
import React from 'react';
import './App.css';
export default function App() {
  return (<div className={'app'}>
    <h2>React Hooks App</h2>
    <li>one</li>
    <li>two</li>
    <li>three</li>
  </div>
  );
}
2. Replace the index.css and App.css in \ReactWork\react-hooks-src\src with these files from hooks-app folder. This folder can be downloaded from here:
Copy: \hooks-app\index.css
To: \ReactWork\react-hooks-app\src\index.css
This should overwrite the existing index.css
Copy: \hooks-app\App.css
To: \ReactWork\react-hooks-app\src\App.css
This should overwrite the existing App.css
3. The app will auto-update in the browser and should look like this:

The list above is hard coded. What we want to do now is to display the data programmatically.
Open the file and take a look. It contains an array of articles.
4. Add the following array into App.js after the imports and before the App function:
const initialArticles = ;
5. We want the App to hold its own state. We can do that with the help of the ‘useState’ hook. To use this hook we first need to update the import statement at the top of App.js to read:
import React, {useState} from 'react';
6. Insert the following as the first line of the App() function (before the return statement):
const = useState(initialArticles);
7. Delete the existing <li> elements being returned from the App() function and replace them with code that uses the JavaScript array map function to output the contents of the array as <li> elements. Your App() function should now look like this:
export default function App() {
  const  = useState(initialArticles);
  return (<div className={'app'}>
    <h2>React Hooks App</h2>
    <ul>
    {articles.map(
      (article, index) => {
        return <li key={index} >
          {article.title}</li>
      }
    )}
    </ul>
  </div>
  );
}
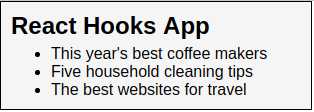
8. Save the App.js file. The app should now appear like this in the browser:
 Part 3 – Retrieve Article Data from a Network Source

The current version of the app displays the contents of the initialArticles array. What we really want though is to retrieve the data from a network source. By default the development server (that serves the app) can also serve static files that are placed in the project’s \public directory.
1. Copy the articles.json file into the project as shown below:
Copy: \hooks-app\articles.json
To: \react-hooks-app\public\articles.json
2. We can make use of the ‘useEffect’ method to insert code that will retrieve data from the article file after the first render. To do that we first need to update the import statement at the top of the file to import the ‘useEffect’ method:
import React, {useState, useEffect } from 'react';
3. We will need to add a function to retrieve the articles.json file contents over the network. We can do this inside of the App() function by creating a ‘const’ type with the name ‘getArticles’ and assigning an anonymous function to it like this:
const getArticles = function(){};
Make sure to place the above code inside the App() function, after the ‘useState’ line and before the return statement.
4. Update the anonymous function you just created with a JavaScript fetch statement that retrieves the url ‘articles.json’
  const getArticles = function(){
    fetch('articles.json')
    .then(response => response.json())
    .then(data => {
        setArticles(data)
      }
    );
  };
Notice how the above code uses the ‘setArticles’ function that was returned from our ‘useState’ call.
5. Insert a ‘useEffect’ method call inside the App() method so that it appears on the line before the return statement:
useEffect(() => {getArticles()}, [] );
Notice the use of the empty array for the second parameter of useEffect. This makes sure the code is only called once – after the first render.
6. Save the App.js file. The browser should now look like this:
 Part 4 – Add ‘Select Item from List’ Capability
In this part we will add the ability to click an item to select it and show its article text.
1. We’ll need to save the index of the selected item in a state variable. To do that add another call to ‘useState’. Name the variable ‘selectedArticleId’ and its modifier method ‘setSelectedArticleId’. Add the statement as the first line of the App() method:
const = useState(-1);
2. Add an onClick handler to the <li> elements that sets the selectedArticleId using the associated modifier method.
onClick={(event) => setSelectedArticleId(index)}
3. When an item is selected we want to apply the ‘selected’ CSS class to the <li>element which will render the element in bold text:
className={(selectedArticleId === index) ? 'selected' : ''}
4. When you are done the App() method’s return statement should look like this:
  return (<div className={'app'}>
    <h2>React Hooks App</h2>
    <ul>
    {articles.map(
      (article, index) => {
        return <li key={index}
          className={(selectedArticleId === index) ? 'selected' : ''}
          onClick={(event) => setSelectedArticleId(index)} >
          {article.title}</li>
      }
    )}
    </ul>
  </div>
  );
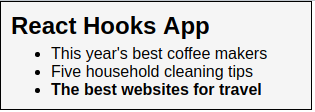
5. Save the App.js file. The app should refresh in the browser. Try clicking on an item to select it. The selected item should appear in bold lettering.
6. Once an article is selected we’d like to see its text displayed below the list. When the app comes up though, before an item is selected we’d like to see the word ‘none’ instead. Lets add a line of code into the App() function that implements that logic and assigns a value to a ‘const’ variable named ‘selectedArticle’. The code can be added just before the return statement.
   const selectedArticle = (articles) ?
    articles.content : 'none';
7. Now we need to add some HTML that displays the heading “Selected Article” and a paragraph right after that with the article text. These elements should be inserted near the end of the return statement after </ul> and before </div>.
    <br /><span className={'bold'}>Selected Article:</span>
    <p>{selectedArticle}</p><br />
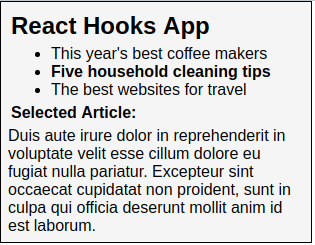
8. Save the App.js file. The browser should update. Select an article. It should now show below the list:
 Part 5 – Implement “Add an Article” Capability
We would like to be able to add and delete articles from the list. We’ll start by adding a section called ‘Controls’ after the selected article. The section will hold two input fields (for title and content) and two buttons – ‘Add Article’ and ‘Delete Selected’.
1. Before we add the controls section we need to create a state variable to hold the input field contents. The shape of the data will be an object with two properties – title and content. You can add this statement as the first line in the App() function:
const = useState({ title: ‘title1’, content: ‘content1’ });
The input fields we display will get their values from formObject.title and formObject.content.
2. Add the following HTML after the paragraph with the selected article and before the closing </div> element (you can cut and paste this text from \hooks-app\controls.html) :
<div className={'controls'}>
<span className={'bold'}>Controls:</span><br/>
<button onClick={null}>Add Article</button>
<button onClick={null}>Delete Selected</button>
<br />
<input type={'text'} name={'title'}
placeholder={'title'} value={formObject.title}
/><br />
<input type={'text'} name={'content'}
placeholder={'content'} value={formObject.content}
/><br />
</div>
3. Save the App.js file. The app should now display a ‘controls’ section below the selected article:
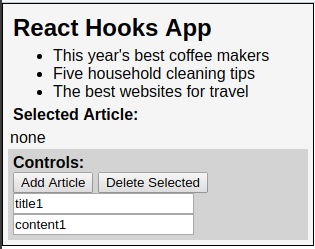
At this point the buttons don’t do anything and the input fields don’t update when you type into them. Lets fix that.
4. Create an anonymous function and assign it to a ‘const’ type named ‘changeHandler’. The function should get a new value for the field being changed and assign it to the property of the same name in the formObject. The function should accept an ‘event’ parameter. (Hint: ‘event.target’ represents the input field being changed) . Add this code right before the return statement:
   const changeHandler = function (event) {
    const name = event.target.name;
    const value = event.target.value;
    formObject = value;
    setFormObject({ ...formObject })
  }
5. Call the ‘changeHandler’ function from the ‘onChange’ event of both <input> elements:
onChange= {(e)=>changeHandler(e)}
6. Save the App.js file. Now keystrokes you enter into the input fields will be added to the formObject and displayed when the component is re-rendered.
7. Update the onClick handler for the ‘Add’ button to create a new array based on the existing articles array and add the formObject to it. This can be done using the spread operator. Use the ‘setArticles’ modifier function to update the articles variable with the new array:
onClick={() => setArticles()}
8. Save the App.js file. The app will update in the browser. Type some text into the title and contents input fields. Click on the ‘Add Article’ button. You should see an article added to the list. Click on the new article in the list and you will see its contents.
Part 6 – Add ‘Delete Selected’ Capability – Optional
Once an article has been selected we want to have the ability to delete it from the list. We will add the functionality now.
1. While we have a button named ‘Delete Selected’ we want that button to be disabled if no article is selected in the list. Lets create a ‘const’ type named ‘validSelectedArticleId’ that we can use to disable/enable the button. This code can be added right before the return statement:
const validSelectedArticleId = function () {
 return( selectedArticleId >= 0 && selectedArticleId <articles.length);
}
2. Set the disabled property of the delete button from the value that was just created:
disabled={!validSelectedArticleId()}
3. Save the file and let the browser refresh. The ‘Delete Selected’ button should be grayed out until an article is selected.
4. Create a ‘const’ type named ‘deleteSelected’ and assign an anonymous function to it that deletes the selected article from the articles array and updates the articles array using its setArticles function. You can use the JavaScript array splice function to implement the delete. Add this code right before the return statement.
  const deleteSelected = function () {
    if (validSelectedArticleId()) {
      articles.splice(selectedArticleId, 1);
      setArticles();
    }
  }
5. Update the onClick handler of the ‘Delete Selected’ button to call the ‘deleteSelected’ function.
onClick={() => deleteSelected()}
6. Save the App.js file and let the browser update. Select one of the articles by clicking on it in the list. The ‘Delete Selected’ button should become active. Click on ‘Delete Selected’. The selected item should be removed from the list. Refreshing the page will restore the original set of articles.
Part 7 – Review
In this tutorial we:
-
Created a new app development environment using create-react-app.
-
Created a React component that displayed a list of articles.
-
Used React Hooks to manage state inside the component and to retrieve article data from a network source.
-
Added the ability to select articles from the list and display their contents.
-
Added the ability to create and add new articles to the list and to delete existing articles.