This tutorial is adapted from Web Age course AWS for Solution Architects Training.
In this tutorial, we will learn how to create and manage the life cycle of an EC2 instance. We will also explore ways to connect to the newly created instance.
Part 1 – Generating a Key Pair in the Management Console
1. Open your browser and sign in to the AWS Management Console.
2. Make sure you are in the right region.
A key pair that we are going to generate consists of a public key and a private key. After the keys have been generated, the public key is stored on AWS, while the private key file (in the pem container format) is downloaded and kept locally.
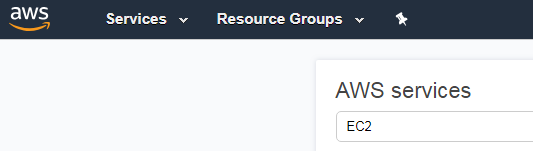
3. Click the Console Home icon and search for and select EC2.
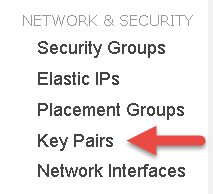
4. In the left-hand side navigation pane, scroll down until you see the Network & Security section, and click the Key Pairs link there.
 5. Click the Create Key Pair button.
6. In the Create Key Pair dialog that opens, for the Key pair name, enter your user name (e.g. S7).
Note: If there is already a key pair by this name previously created, delete it by selecting it and clicking the Delete button.
7. Click the Create button.
The AWS cryptography infrastructure goes ahead and generates the key pair. Chrome will automatically start downloading the <your_user_name>.pem file containing your private key.
Note: Alternatively, you may be prompted with the download confirmation dialog for the private key, in which case, accept the download.
Note: AWS generated a 1024-bit SSH-2 RSA public/private key pair; the pem file you are prompted to download contains your base64-encoded private key that you will use in establishing SSH connections to your Linux EC2 instances.
8. Locate and open the downloaded pem file in your text editor.
You should see the following content:
-----BEGIN RSA PRIVATE KEY-----
MIIEpQIBAAKCAQEAso0IusH90PeWWNxGQaM2i/OiCndpoFwKOA/Xl6RdqfVUschvl7sax8jwswMl
0ut6zy28czUGH9jmB8R/B9NVHeqwDrn0bNj02khwx461gS+FtfuTkiarZcMA1yJRCpQ79hbY3ns+
FuruD2g3CmkTwMMMLD7fNjkd4eXvN01Fdi20sR/KKEMZnEO/f6pQ/TTMZ2Mqt4o1Msiq1I3qOf5+
... CUT FOR SPACE ...
nwVN9ZUcpxj0pXdtOup+OLuYc2M6ZXFegDmHglcb06tBIDmdAoGABqfEm1BgFe+LrGxvgkSotfW9
EyfxqVo3h1xTXUHVJGY5WcjOp8vqjPjoL/GRKVEobBQtsUq+g+8T4DkWZYCXwORD4Tyst5FA9xvR
BX9tc8o3f+OzuOHzFp6E0YxjNyjW0/cP6yFOvwl8KHfPLMSHD6cAYzFJ57QgEcyrfmrze1U=
-----END RSA PRIVATE KEY-----
9. Close the text editor.
10. Create a folder C:\Keys\ on your file system.
11. Copy the pem file from your browser’s downloaded files directory to the C:\Keys\ folder for ease of access.
Part 2 – Convert Your Private Key Using PuTTYgen
PuTTY , in its present version, does not support the pem format directly and in this part we will show how to use the PuTTYgen tool that is bundled with the PuTTY complete download package to convert the pem format into the ppk key format understood by PuTTY.
PuTTYgen can be installed on your machine if not installed or you don’t have downloaded PuTTY complete download package. It can be installed from here.
1. Start PuTTYgen .
2. In the Parameters section of the PuTTY Key Generator window that opens, click the SSH-1 RSA (or SSH-2 RSA depending on your version of PuTTY) radio button and enter 1024 in the Number of bits in a generation key text box.
 3. Click the Load button.
The Load private key dialog opens.
4. Navigate to the C:\Keys folder and select All Files (*.*) in the file types drop-down box; select your pem file.
5. Click the Open button.
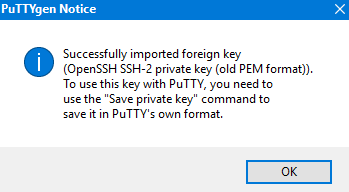
6. In the PuTTYGen notice dialog that opens (text in your dialog may slightly differ), click OK.
 7. Click the Save private key button in the PuTTY Key Generator window.
8. In the PuTTY warning dialog that opens, click Yes.
9. Save the file under the same name as your pem file, but now with the extension ppk.
10. Close the PuTTY Key Generator window.
11. Sign Out from the Management Console.
12. Close all open browsers and text editors.
Part 3 – Workspace Set-up
1. Open your browser and sign in to the AWS Management Console.
2. Make sure you are in the right region.
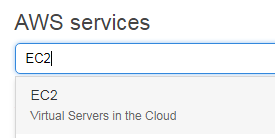
3. Search for and select EC2 (Virtual Servers in the Cloud)
 You will be placed in the EC2 Dashboard page.
4. Click Instances in the left-hand navigation pane.
You are going to create an EC2 instance named as your user name. If there is already an instance named as your user name then delete it following these steps:
5. If you see any instance with your name then select the instance named after your user name (shown as SX below), click the Actions button and select Instance State | Terminate
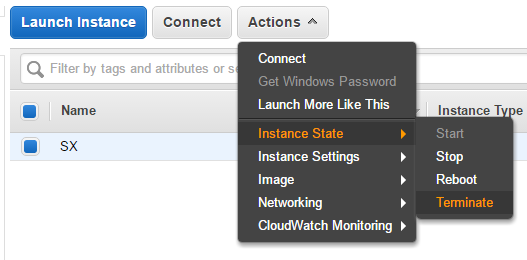 Termination, essentially, deletes the instance. Wait for the process to complete. Note, that the instance may not be removed from the Instances page right away.
Part 4 – Create an EC2 Instance
1. Click the Launch Instance button at the top of the page.
 You will be brought to the Step 1 of the instance creation workflow.
 Quickly review available images.
Notice the presence of the EBS type volume feature (e.g. EBS backed image, or EBS General Purpose Volume, etc.) in the AMI descriptions. EBS offers a persistence (non-ephemeral) storage that retains files you create between server re-starts. This is an important consideration as AMI images backed by Amazon EC2 instance store are treated as ephemeral storage types and your files created when your instance is running will be deleted when you stop your instance.
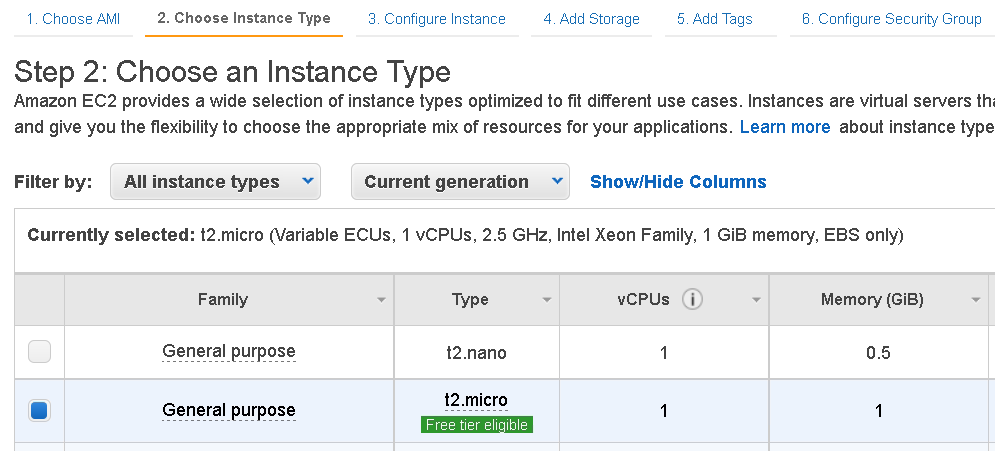
2. Click the Select button for the item listed on top to choose the 64-bit Amazon Linux AMI.
 3. Click the check box to the left on the list to choose the t2.micro type.
 4. Click Next: Configure Instance Details.
You will be presented with the following page:
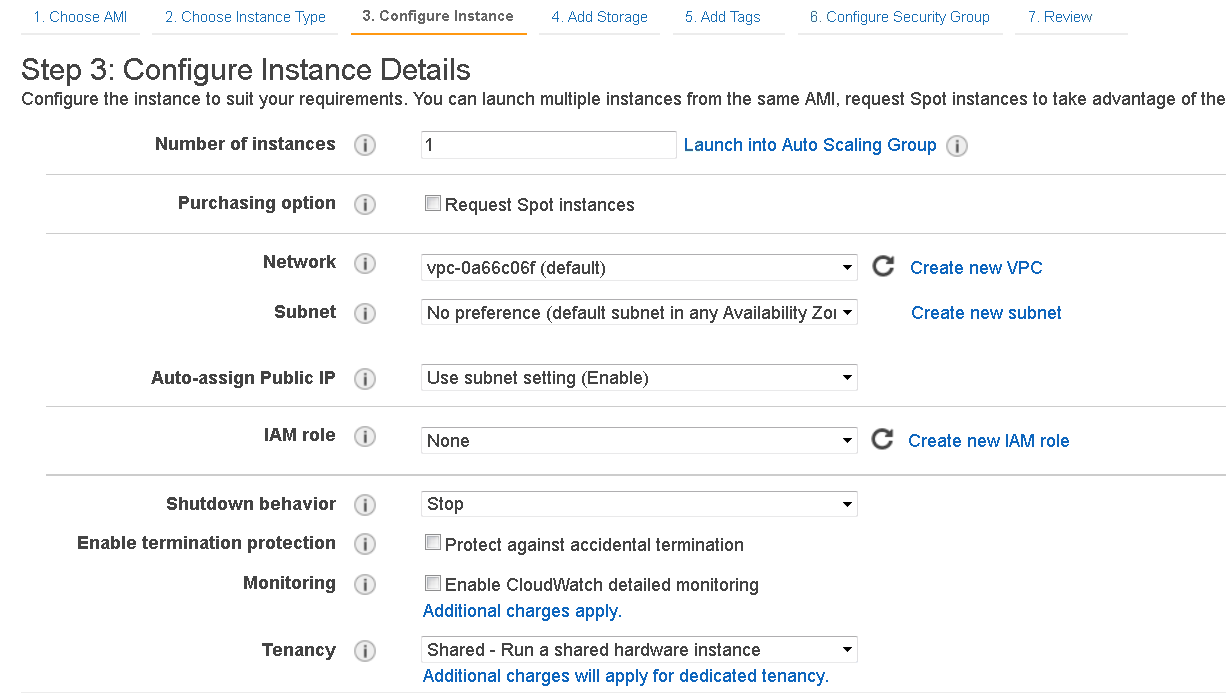 Take some time familiarizing yourself with the configuration options presented on the page.
Notice that the instance will be placed in the default VPC (Amazon Virtual Private Cloud ) identified by the Network property.
You may want to click the Request Spot Instances box to see what is needed to place a request for a spot instance. There may be no Spot capacity for your instance type in the availability zone.
If you did select the Request Spot Instances box, make sure you uncheck it, as we are not going to make a request for a spot instance.
We are going to accept the preselected defaults, which are acceptable for our purposes.
5. Click the Review and Launch button at the bottom of the page.
You will be brought to Step 7: Review Instance Launch page.
Review the selected AMI details shown on the page. Ignore any warning messages that may appear at the top of the page.


6. Click the Launch button at the bottom of the page.
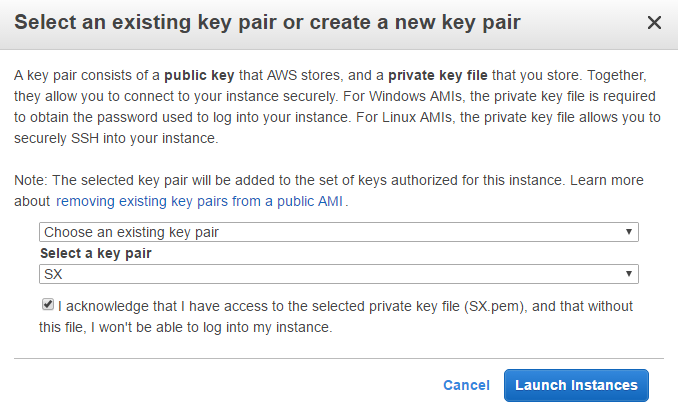
You will be prompted with the Select an existing key pair … dialog.
7. Select the Choose an existing key pair option in the first drop-down box and the key pair you had generated and check the I acknowledge … box to confirm that you have the private key.
 8. Click the Launch Instances button in the bottom right corner of the page.
The Launch Status page opens.
9. Write down the EC2 instance name shown at the top of the page.
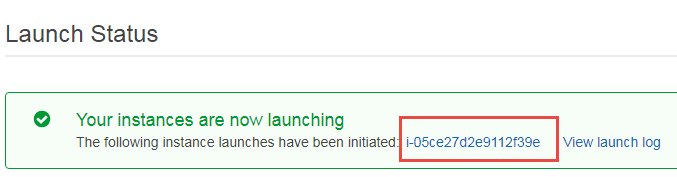 10. Click the View Instances button in the bottom right corner of the page.
You will be placed in the EC2 Instances page where you should see your newly created EC2 instance with the instance id you wrote down in the previous step.
The Instance State column of your instance record may show the “pending” diagnostic message. Wait until you see the “running” status (the green sphere icon).

11. Click the Name area, which is currently blank, and enter your user name (e.g. S4).
Spend some time to review your instance’s configuration details displayed in a tabbed dialog at the bottom of the page.
12. First, check the Security groups by clicking the associated link in the Description tab of the instance details page section (your security group link may have a different name).
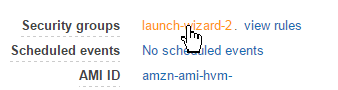 The security group in AWS is a set of firewall rules mostly associated with the inbound and outbound ports. When you were creating your instance, the EC2 instance creation wizard created an associated security group for it and by default it has port 22 open to allow inbound TCP connections – you will remember that this port is assigned to the SSH protocol.
13. On the Inbound tab of the details page section of the security group you clicked, you can see that the SSH port 22 is (in the Inbound tab), in fact, open.
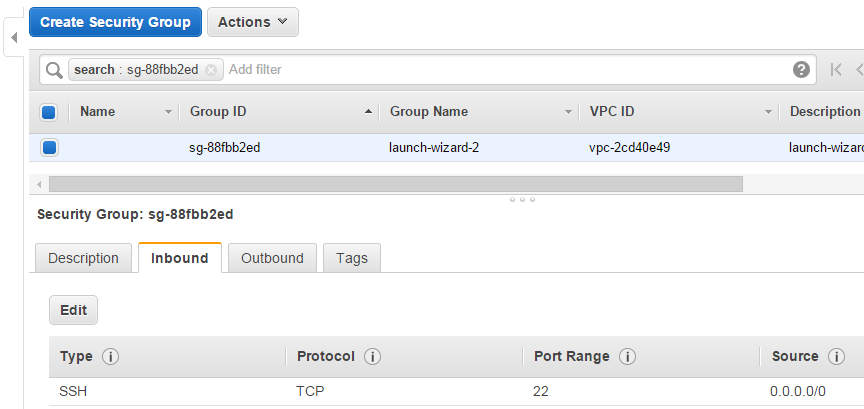 You can further tighten the rule for incoming traffic by limiting the range of source IP addresses that can reach your EC2 instances. For that, you need to specify the range of IP addresses in CIDR (Classless Inter-Domain Routing) notation; the 0.0.0.0/0 string that is currently used indicates that any TCP/IP client on the Internet can reach your EC2 instance on port 22.
14. Click on the Instances page, notice that the instance has been assigned a public IP address and a public DNS name. Note that after you restart the instance, the instance will receive a new IP address and a new DNS name, so those values are not static.
You can quickly verify that the public DNS name is, in fact, mapped to the public IP address of your instance.
Open a command prompt terminal window and type in the following command:
nslookup <YOUR INSTANCE PUBLIC DNS NAME>
e.g.
nslookup ec2-54-149-210-130.us-west-2.compute.amazonaws.com
The command should report the public IP address assigned to your instance, which is, by the way, embedded in the DNS name.
As you can see, the new DNS name is instantly available and you don’t need to wait until it is propagated through a chain of DNS servers.
15. Write down or remember the public IP address – you will use it when connecting to the instance over SSH later in the tutorial.
Note that AWS assigns default users to instances launched from Linux AMI images as follows:
-
For an Amazon Linux AMI, the user name is ec2-user
-
For a RHEL5 AMI, the user name is either root or ec2-user
-
For an Ubuntu AMI, the user name is ubuntu
-
For a Fedora AMI, the user name is either fedora or ec2-user
-
For SUSE Linux, the user name is root
Part 5 – Connect to the EC2 Instance Using the PuTTY SSH Client
PuTTY allows you to connect to your EC2 instances outside of your browser; it also does not have a dependency on Java to be installed on your machine.
Let’s see what is required to connect to your EC2 instance using PuTTY.
1. Open PuTTY on your machine. Install it from here if you don’t have it already installed on your machine.
2. In the PuTTY window that opens, make sure that the Connection type is set to SSH and the port is 22:
 3. In the Host Name (or IP address) input box, enter the public IP address you captured in the previous part of this tutorial.(Step 15 of Part 4)
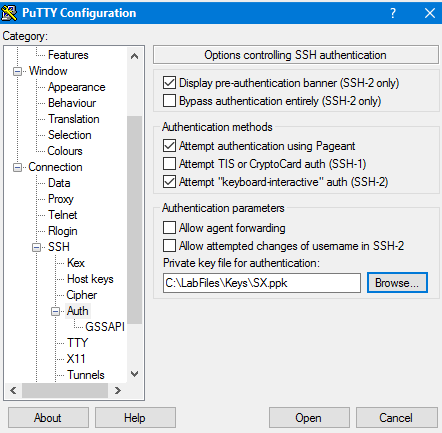
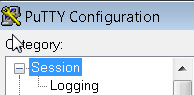
4. In the Category pane, navigate to Connection | SSH | Auth.
The Options controlling SSH authentication panel opens.
5. Click Browse and select the ppk file that you generated from the pem file. (the SX.ppk file is shown below for illustration).
 6. Go back to Session.
 7. Click Open.
8. In the PuTTY Security Alert dialog that pops up, click Yes to confirm that you trust the target host.
9. A windows will open asking for login. Enter ec2-user and hit enter.
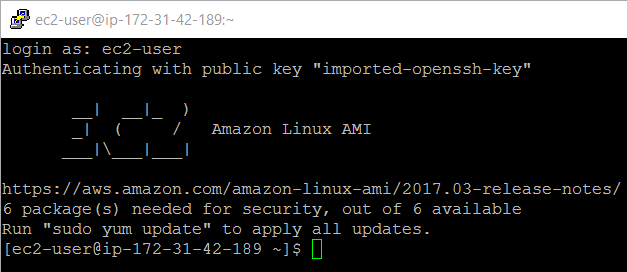 You should be placed right into the home directory of the ec2-user user on your EC2 instance.
The PuTTY complete download package comes with the secure file copy command-line utility called pscp that you can use to transfer file to your EC2 instance.
Let’s see how it works.
10. In the terminal window, type in this command:
ls -l
You will see that there is no files.
![]()
11. Enter the following command to upload any file to the home directory of the ec2-user user:
pscp -i C:\Keys\<YOURFILE>.ppk <filename> <Your Connection String>:/home/ec2-user
Replace <Your Connection String> with your actual connection string, e.g.
ec2-user@YOUR_INSTANCE_PUBLIC_IP_ADDRESS
For example,
pscp -i C:\Keys\SX.ppk PUTTY.HLP ec2-user@35.163.188.27:/home/ec2-user
Wait until the file has been fully transferred to AWS.
12. Close the command prompt window where you ran the pscp command.
13. In the PuTTY window, enter again the command ls -l to verify that the file has been, in fact, uploaded.
$ ls -l
total 692
-rw-rw-r-- 1 ec2-user ec2-user 704566 Jun 13 15:36 PUTTY.HLP
Note: If you prefer to use a GUI file transfer tool instead, you can use the WinSCP free secure copy utility (http://winscp.net/).
OK, we are done using PuTTY for connecting to our EC2 instance.
14. In the PuTTY window, type in exit and press Enter to close the window.
Part 6 – Stop the EC2 Instance
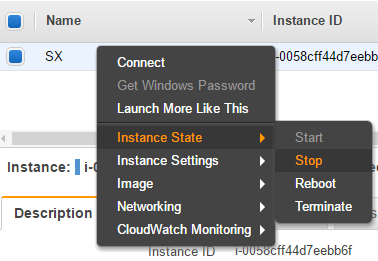
1. In the browser open on the Instances page, right-click your instance (SX is shown below for illustration purposes) and select Instance State | Stop
 Note: Whenever you want start your instance, use the Instance State | Start menu option, not the Launch button at the top of the page.
2. In the Stop Instances confirmation dialog, click Yes, Stop.
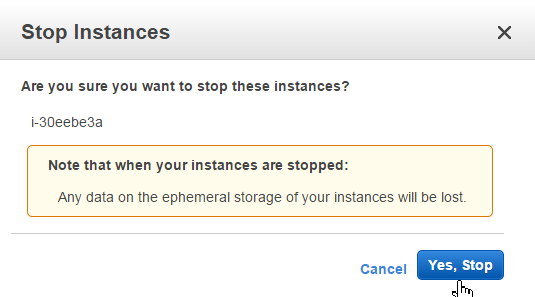 Note: The message displayed: “Any data on the ephemeral storage of your instances will be lost.” is not applicable to our instance as its root volume (the entire virtual system disk) is backed by EBS (we will review this storage aspect in a moment).
3. Wait for the instance to completely stop.
 When you post the Stop request to your EC2 instance, the virtual machine sends the “Power off Now!” type of signal to the host OS and then shuts down.
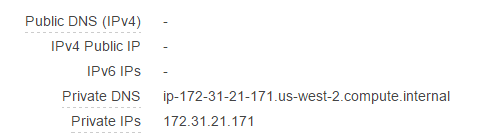
The public IP address, if any was assigned to your instance, will be revoked. You can observe this fact by clicking the Description tab at the bottom of the Instance page (the private non-routable IP address is retained):

Part 7 – Check the Root Volume Type
Now, if you start your instance and connect to it using any of the above methods, you will see that the files we created on our EC2 instance are still there as our AMI image is EBS-backed. This verification activity is left to you as an optional exercise.
As we mentioned above, when we were creating our instance, it is only AMI images backed by Amazon EC2 instance store that have non-persistent (ephemeral) root volume.
You can quickly find out the type of your volume by looking at your instance’s Root device type under the Description tab.
In our case, we have it as ebs.
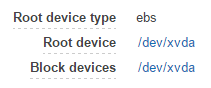 That means we have a non-ephemeral (durable) type of persistence store.
1. Sign Out from the Management Console.
2. Close all.
Part 8 – Review
In this tutorial, we reviewed steps required to create, start, and stop an EC2 instance as well as options available for connecting to that EC2 instance in AWS cloud using PuTTY. We also learned how to check the type of the root volume.