The Angular HTTP client service provides the ability to interact with REST web services from Angular applications. It is a best practice to perform this interaction from a custom service instead of doing so from a component.
In this tutorial you will implement various methods in a custom service that will provide data to a completed component to display this data. Once the methods of the service are implemented, the features of the component displaying data will become active.
Before you start working on this tutorial, please install the required software as mentioned in the Set Up Guide here.
Part 1 – Business Requirements
In this tutorial, we will create a book database management system. Our application will let users add, edit and delete books.
The backend web service exposes this interface.
|
URL Path |
HTTP Method |
Notes |
|
/books |
GET |
Returns an array of all books. |
|
/books/ISBN |
GET |
Returns a specific book given its ISBN. Example: /books/123-456 |
|
/books/ISBN |
DELETE |
Deletes a specific book given its ISBN. Example: /books/123-456 |
|
/books/ISBN |
PUT |
Adds or updates a book. |
Our application will need to develop these pages.
Book List Page:
Add Book Form:

Update Book Form:

Part 2 – Get Started
We will now create a new Angular application.
1. Open a command prompt window.
2. Go to the C:\LabWork folder. Create the folder if it hasn’t been created.
3. Run this command to create a new project called rest-client.
ng new rest-client --routing --style css
Part 3 – Import Additional Modules
We will make web service calls using the HttpClient Angular service. This is available from the HttpClientModule. We need to import this module and a few others from our application module.
1. Open rest-client\src\app\app.module.ts.
2. Add these import statements.
import { HttpClientModule } from '@angular/common/http';
import { FormsModule } from '@angular/forms';
3. Import the modules as shown in bold face below.
  imports: [
    BrowserModule,
    AppRoutingModule,
    HttpClientModule,
    FormsModule
  ],
This is Angular module import as opposed to the ES6 import in the previous step. This will automatically add all the services exported by HttpClientModule (such as HttpClient) to the providers list of our application module. This will let us inject HttpClient throughout our application.
4. Save changes.
Part 4 – Create the Service
We will now create an Angular service where we will isolate all web service access code. Generally speaking create the services before starting to work on components.
1. Open a new command prompt window and from the root of the rest-client project run this command.
ng generate service dataAngular CLI not Installed Globally?
Run: npm run ng generate service data
This will create a service class called DataService in data.service.ts file.
2. Open C:\LabWork\rest-client\src\app\data.service.ts.
3. Add these import statements.
import { HttpClient } from '@angular/common/http';
import { Observable } from 'rxjs';
Important: In prior versions of Angular ‘Observable’ was imported from the ‘rxjs/Observable’ or ‘rxjs/Rx’ package. Older tutorials online will show those packages. With Angular 6 and later versions you should import Observable from ‘rxjs’ package.
4. Add the Book class like this.
export class Book {
  isbn: string
  title: string
  price: number
}
5. In the constructor of the DataService class inject the HttpClient service.
constructor(private http: HttpClient) { }6. Save changes.
7. Add the ‘getBooks‘ method to the DataService class as follows.
getBooks() : Observable<Book[]> {
  return this.http.get<Book[]>("/books")
}
This means the method returns an Observable that delivers an array of Book objects.
8. Add the ‘getBook‘ method.
getBook(isbn: string): Observable<Book> {
  return this.http.get<Book>(`/books/${isbn}`)
}
9. Add the deleteBook() method as follows.
deleteBook(isbn: string): Observable<any> {
  return this.http.delete(`/books/${isbn}`)
}
Note: In this case we don’t really care for the data type of the response from the server. As a result the method returns an Observable<any>.
10. Add the ‘saveBook‘ method as follows. We will use this to both add and update a book.
saveBook(book: Book): Observable<any> {
  return this.http.put(`/books/${book.isbn}`, book)
}
11. Save changes.
Part 5 – Generate the Components
1. Run these commands to create a component for each page in our application.
ng g c book-list
ng g c add-book
ng g c edit-book
Part 6 – Setup the Route Table
1. Open app-routing.module.ts.
2. Import the component class names.
import { BookListComponent } from './book-list/book-list.component';
import { AddBookComponent } from './add-book/add-book.component';
import { EditBookComponent } from './edit-book/edit-book.component';
3. Setup the route table as shown in bold face below.
const routes: Routes = [
  {path: "", component: BookListComponent},
  {path: "add-book", component: AddBookComponent},
  {path: "edit-book/:isbn", component: EditBookComponent},
];
Note a few things:
-
EditBookComponent receives the ISBN number of the book as a path parameter.
-
Never start a path with a “/”.
-
BookListComponent has the default path (empty string).
4. Save changes.
5. Open src/app/app.component.html.
6. Delete all lines except for the last one. All that will be left is this.
<router-outlet></router-outlet>
The routed components will be rendered there.
7. Save changes.
Part 7 – Write the BookListComponent
1. Open src/app/book-list/book-list.component.ts.
2. Add this import statement.
import { DataService, Book } from '../data.service'3. Inject the service from the constructor.
constructor(private dataService: DataService) { }4. Add a member variable to the class that will store the list of books.
books:Book[] = []5. From the ngOnInit() method fetch the books as shown in bold face below.
  ngOnInit() {
    this.dataService.getBooks().subscribe(bookList => {
        this.books = bookList
      })
  }
The dataService.getBooks() method returns an Observable<Book[]>. We must subscribe to this Observable to get the data.
6. Save changes.
We will now work on the template of the component.
7. Open book-list.component.html.
8. Set the contents of the file like this.
<h3>Book Library</h3>
<div *ngIf="books.length > 0">
  <div *ngFor="let book of books">
    {{book.isbn}} - {{book.title}} <b>{{book.price}}</b>
  </div>
</div>
<div *ngIf="books.length == 0">
  There are no books in the library.
</div>
9. Save changes.
Before we develop the other components we should do a test and make sure whatever we have so far works. But we have to do a bit of administration work before we can do any testing.
Part 8 – Setup Reverse Proxy
The index.html file for our application is served by the Angular CLI web server. But the backend web service will run on another server (port 3000). If our application tries to directly call the web service, it will violate the same origin policy. One way to fix this issue is to setup Angular CLI as a reverse proxy for the web service calls. This way all HTTP requests from the browser will first go to the Angular CLI server. If the request is for a web service (/books/*) the Angular CLI server will forward it to the backend web service.
1. Copy the file:
proxy.config.json
from: C:\LabFiles\rest-client\
to: C:\LabWork\rest-client\
2. Edit the package.json file from C:\LabWork\rest-client\, replace the start line in the scripts section with the following and save the file:
"start": "ng serve --proxy-config proxy.config.json",3. Save changes.
Part 9 – Start the Servers
1. The backend web service is available in the rest-server . You can download rest-server zip file and extract in C:\LabWork. It is written in Node.js. But in real life the backend web service can be written in anything. To start it open a command prompt and navigate to the C:\LabFiles\rest-server directory. Then execute the following command:
npm start2. To start the Angular application server open another command prompt and navigate to the project directory: C:\LabWork\rest-client. From that directory run the following command to compile Typescript and start the embedded server:
npm startNow we see the benefit of starting the dev server using npm start rather than ng serve. We don’t have to specify the proxy config file every time we start the server.
3. Test to make sure the REST server is working by opening a browser and entering the following address:
http://localhost:3000/books/You should see some JSON data show up in the browser.
 4. Next test to make sure that the reverse proxy configuration for the REST server is working by opening a browser and entering this address:
http://localhost:4200/books/You should get the same results as before – some JSON data should show up in the browser.
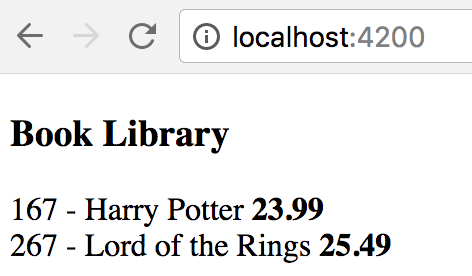
5. Finally check to see that the Angular application is coming up by opening the following URL in the browser:
http://localhost:4200You should see the following in the browser:
 Part 10 – Implement Book Removal
1. Open src/app/book-list/book-list.component.ts.
2. Add the deleteBook() method like this.
deleteBook(book: Book) {
  if (!window.confirm('Are you sure you want to delete this item?')) {
    return
  }
  this.dataService.deleteBook(book.isbn).subscribe(_ => {
      //Delete local copy of the book
      this.books = this.books.filter(b => b.isbn !== book.isbn)
  })
}
3. Save changes.
4. Open book-list.component.html.
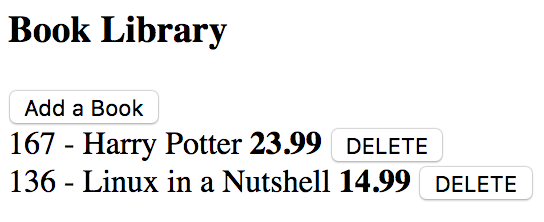
5. Add a DELETE button as shown in bold face.
<div *ngFor="let book of books">
  {{book.isbn}} - {{book.title}} <b>{{book.price}}</b>
  <button (click)="deleteBook(book)">DELETE</button>
</div>
6. Save changes.
7. Return to the browser. It should still display the same list of books.
8. Click on the ‘DELETE‘ button next to one of the entries in the list and then click on the ‘OK‘ button on the confirmation dialog to confirm you want to delete the item.
9. Refresh the page to make sure the book is removed from the list by the backend service.
Only delete one book. It is best to avoid deleting the last book if possible.
Note: If while testing you no longer have any books in the list, you can always return to the REST service command prompt and use ‘CTRL-C’ to stop running the REST Server. Restart the server with ‘npm run start‘ and the initial list of books will be restored.
Part 11 – Implement AddBookComponent
1. Open src/app/add-book/add-book.component.ts.
2. Add these import statements.
import { DataService, Book } from '../data.service'
import { Router } from '@angular/router'
3. Inject the services from the constructor.
constructor(private dataService: DataService, private router: Router) { }
4. Add a member variable to the class that will store user’s input for a book.
book:Book = new Book
5. Write in the addBook() method like this.
addBook() {
  this.dataService.saveBook(this.book).subscribe(_ => {
    //Go back to the home page
    this.router.navigate(['/'])
  })
}
6. Save changes.
We will now develop the form.
7. Open src/app/add-book/add-book.component.html.
8. Develop the form like this.
<h3>Add a Book</h3>
<div>
  <input type="text" ="book.isbn" placeholder="ISBN">
</div>
<div>
  <input type="text" ="book.title" placeholder="Title">
</div>
<div>
  <input type="number" ="book.price" placeholder="Price">
</div>
<div>
  <button (click)="addBook()">Save</button>
</div>
9. Save changes.
We now have to add a button the BookListComonent to navigate to the AddBookComponent.
10. Open src/app/book-list/book-list.component.html.
11. Add a button to go to the add book form as shown in bold face below.
<h3>Book Library</h3>
<div>
  <button ="['/add-book']">Add a Book</button>
</div>
12. Save changes.
13. Return to the command prompt running the project and check that the files are compiled without any errors.
Part 12 – Test Changes
1. Return to the browser and refresh the main URL of the application. It should still display the same list of books.
http://localhost:4200/2. Click on the ‘Add a Book‘ button.
3. Enter some data like this.
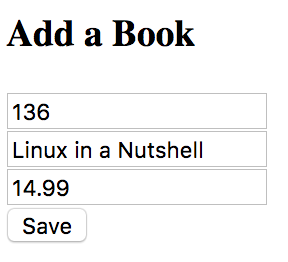 4. Click the ‘Save‘ button to submit the data.
5. Verify that the book list page is shown again with the newly added book in the list.
 6. Add a few books. Use the browser’s network developer tool to verify that only Ajax (XHR) requests are taking place. There should be no page reload (document load) in a single page application.
Part 13 – Implement EditBookComponent
1. Open src/app/edit-book/edit-book.component.ts.
2. Add these import statements.
import { DataService, Book } from '../data.service'
import { ActivatedRoute, Router } from '@angular/router'
3. Inject the services from the constructor.
constructor(private dataService: DataService,
  private activeRoute: ActivatedRoute,
  private router: Router)  {  }
4. Add a member variable to the class that will store information about the book we are editing.
book:BookThis component will need to retrieve the ISBN number from the path parameter and then fetch the book by calling into the backend web service. We will do that from the ngOnInit() method.
5. Write the ngOnInit() method as shown in bold face below.
ngOnInit() {
  this.activeRoute.params.subscribe(params => {
    let isbn = params
    this.dataService.getBook(isbn).subscribe(book => {
      this.book = book
    })
  })
}
6. Write in the updateBook() method like this.
updateBook() {
  this.dataService.saveBook(this.book).subscribe(_ => {
    //Go back to the home page
    this.router.navigate(['/'])
  })
}
7. Save changes.
We will now develop the form.
8. Open src/app/edit-book/edit-book.component.html.
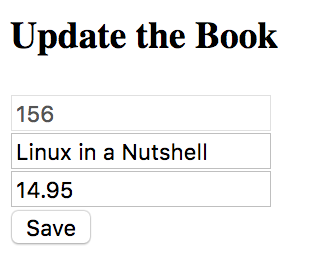
9. Develop the form like this.
<h3>Update the Book</h3>
<div *ngIf="book != undefined">
  <div>
    <input type="text" ="book.isbn" placeholder="ISBN" disabled>
  </div>
  <div>
    <input type="text" ="book.title" placeholder="Title">
  </div>
  <div>
    <input type="number" ="book.price" placeholder="Price">
  </div>
  <div>
    <button (click)="updateBook()">Save</button>
  </div>
</div>
10. Save changes.
Finally, we need to add a button for each book in the book list page to go to the edit page.
11. Open src/app/book-list/book-list.component.html.
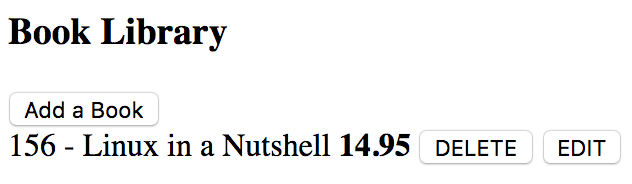
12. Add the EDIT button below the DELETE button as shown in bold face.
<button (click)="deleteBook(book)">DELETE</button>
<button ="['/edit-book', book.isbn]">EDIT</button>
Notice how we supply the ISBN path parameter in the link.
13. Save changes.
Part 14 – Test
1. Back in the browser you should now see the EDIT button for each book.
 2. Click the EDIT button.
3. Verify that the form is pre-populated with the book’s data.
 4. Change the title and the price and click Save.
5. Verify that the changes are reflected in the book list.
Part 15 – Clean up
1. In the REST Server Application command prompt press ‘CTRL-C’ to stop the server.
2. Hit Control+C to close the Angular dev server.
3. Close all open text editors and browser windows.
Part 16 – Review
In this tutorial you implemented a fairly realistic application that calls a back end web service and uses routing.