This tutorial is adapted from the Web-Age course Angular Unit Testing with Jasmine.
In this tutorial, you will create an Angular application with a couple of components. Then you will configure test suites for those components in Jasmine. You will use Karma to run the test suites and use Chrome Developer tools and VS Code to debug the tests.
Part 1 – Create an Angular Application
In this part we will use the Angular CLI to create and run a simple Angular application.
1. Create a directory Labworks in C drive.Open a DOS shell (command prompt window) and navigate to:
cd C:\LabWorks
2. Run the following command to create a new Angular application:
ng new karma-test --defaults
It may take several minutes for this command to complete.
3. Navigate to the new project:
cd C:\LabWorks\karma-test
4. Run the application with the following command:
ng serve --open
5. You should see a browser open to this page:
6. Type CTRL ‘C’ in the DOS shell to stop the server and press Y.
7. Close the Web Browser.
Part 2 – Create a Component with a Reactive Form
In this part, you will create a component with a simple Reactive Form.
1. In the DOS shell, make sure you are at:
C:\LabWorks\karma-test
2. Create a new component with the following command:
ng generate component simple-form
3. Open VS Code.
4. Open the C:\LabWorks\karma-test folder.
5. Check the box to Trust the authors… and click Yes, I trust the authors.
6. Open src>app>app.module.ts in VS Code.
7. Add the following import to the top of the file:
import { ReactiveFormsModule } from '@angular/forms';
8. Modify the imports array to include the ReactiveFormsModule:
    imports: [
      BrowserModule,
      ReactiveFormsModule
    ],
9. Save the file.
10. Open src>app>app.component.html
11. Replace the contents of the file with the following code:
    <h1>{{title}}</h1>
    <simple-form></simple-form>
12. Save the file.
13. Open src>app>simple-form>simple-form.component.css
14. Put the following CSS in the file:
* { margin: 0.25em }
15. Save the file.
16. Open src>app>simple-form>simple-form.component.html
17. Replace the contents of the file with the following code:
    <form =numForm>
      <label>Enter a number between 1-10</label>
      <input type=number formControlName=num>
      <button
        id=submit-button
        (click)=onSubmit()
        ="numForm.invalid || numForm.pristine">
          Submit</button>
    </form>
18. Save the file.
19. Open src>app>simple-form>simple-form.component.ts
20. Add the following import:
import { FormControl, FormGroup, RequiredValidator, Validators } from '@angular/forms';
21. Change the selector (in the Component decorator) to:
selector: 'simple-form',
22. Add the following field to the SimpleFormComponent class:
numForm: FormGroup
23. Enter the following code below the constructor:
onSubmit() {}
24. Replace the ngOnInit() method with the following code:
    ngOnInit(): void {
      this.numForm = new FormGroup({
        num: new FormControl("",)
      })
    }
25. Save the file.
26. From the VS Code menu, select Terminal → New Terminal.
27. In the Terminal , click the + icon and select Command prompt.

28. In the new Command Prompt Terminal, start the server (and open a browser) with the following command:
ng serve --open
You should see the application with the Submit button disabled.

29. Using the control box, enter a number between 1-10 and you should see the Submit button enabled.
30. Enter a number greater than 10 and the Submit button is disabled.
31. Enter Ctrl-C in the VS Code terminal to shut down the server, and press Y.
Part 3 – Modify the Test Suites
In this part, you will run the test suites that were auto-generated by the CLI. Since you modified the components (and not the tests) one of the tests will fail. You will debug the test in Chrome and figure out how to fix it.
1. Type the following command in the VS Code terminal to start the server and run Karma in Chrome.
ng test
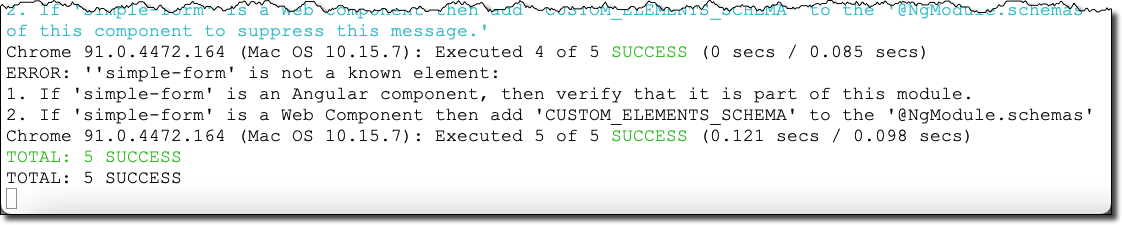
2. Look at the terminal window:
You should see that 1 test failed and 3 tests succeeded.
3. You should see the same results in the browser:
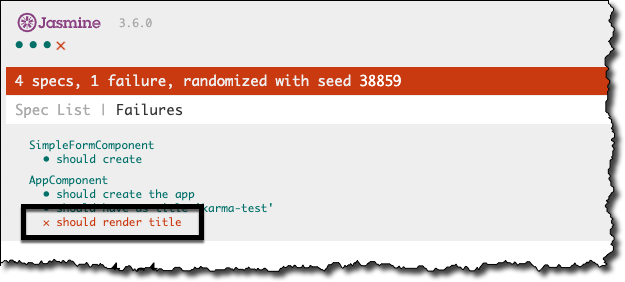
4. Click on the Spec List link in the browser:
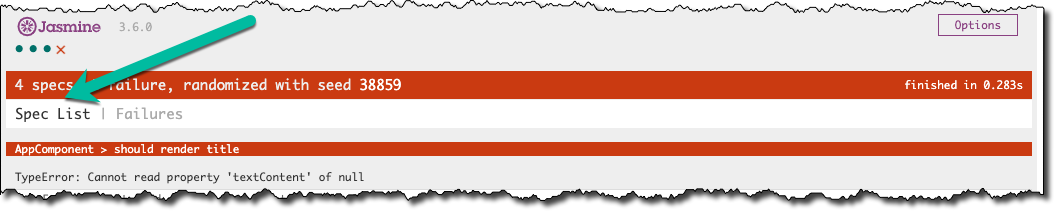
5. Look at the list of components and tests (specs). You should see one spec rendered in red indicating a failure:
6. Open src>app>app.component.spec.ts
7. Look for the spec, should render title:
    it('should render title', () => {
      const fixture = TestBed.createComponent(AppComponent);
      fixture.detectChanges();
      const compiled = fixture.nativeElement;
      expect(compiled.querySelector('.content span').textContent)
          .toContain('karma-test app is running!');
    });
Since we changed the HTML template we need to change the spec.
8. Change the query selector to h1 and the content to karma:
      expect(compiled.querySelector('h1').textContent)
          .toContain('karma-test');
9. Save the file.
10. The test should still be running so you should see the test succeed in the Terminal and the browser:

11. Enter Ctrl-C in the VS Code terminal to stop the test and press Y.
Part 4 – Modify the Spec and Debug in Chrome
In this part, you will create a spec that verifies that the validation will accept a number between 1-10 and another spec to verify that it will reject a number outside that range. You will then run the specs in Karma and debug in Chrome.
1. Open src>app>simple-form>simple-form.component.spec.ts
2. Add a new spec:
    it('should accept a value between 1-10', () => {
      component.numForm.controls.num.setValue("3")
      expect(component.numForm.valid).toBeTrue()
    })
3. Save the file.
4. Type the following command in the VS Code terminal to start the server and run Karma in Chrome.
ng test
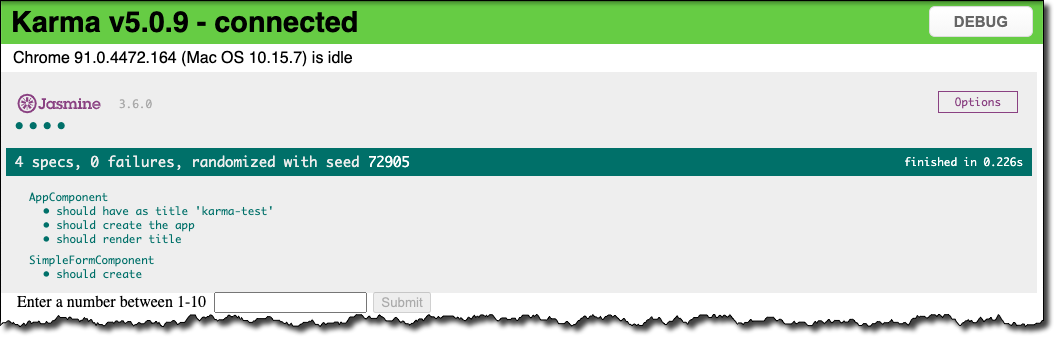
5. The test engine sees that 5 tests succeed in both the Terminal and the browser:

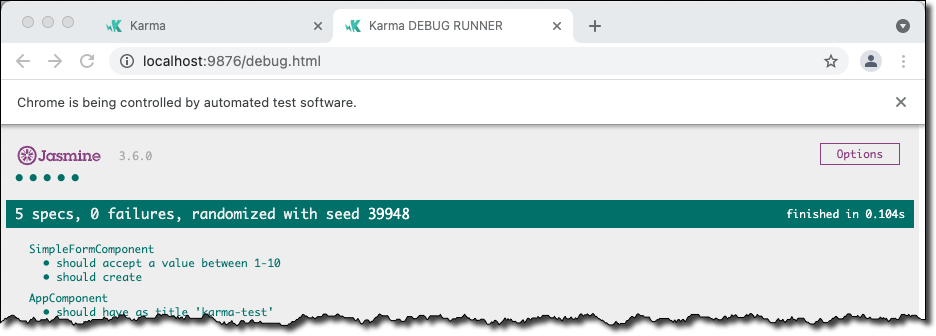
6. Click the DEBUG button in Chrome.
7. You should see a new tab (Karma DEBUG RUNNER) open and the tests succeeded:
8. Open the Chrome Developer Tools
9. Select the Sources tab.
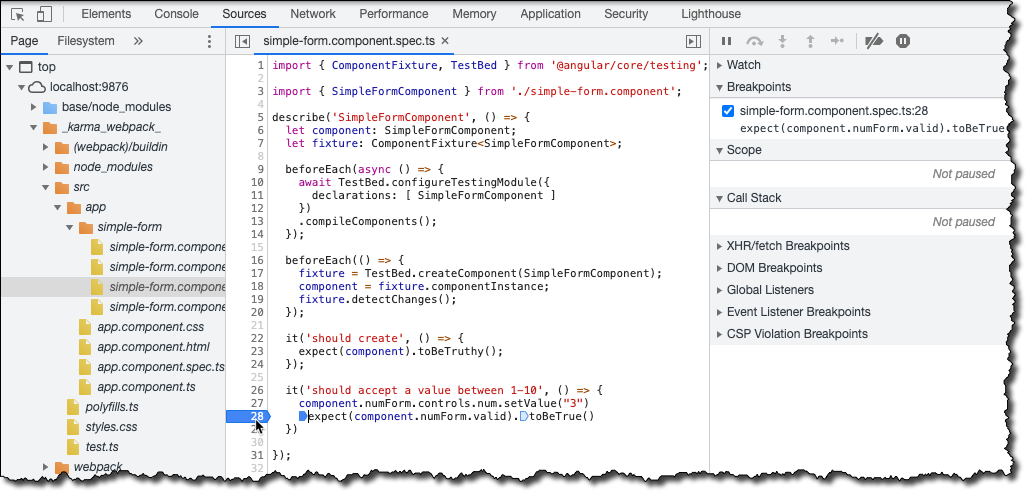
10. Open _karma_webpack_>src>app>simple-form>simple-form.component.spec.ts
11. Click on the line number next to the expect() function in ‘should accept a value between 1-10’ to set a breakpoint:
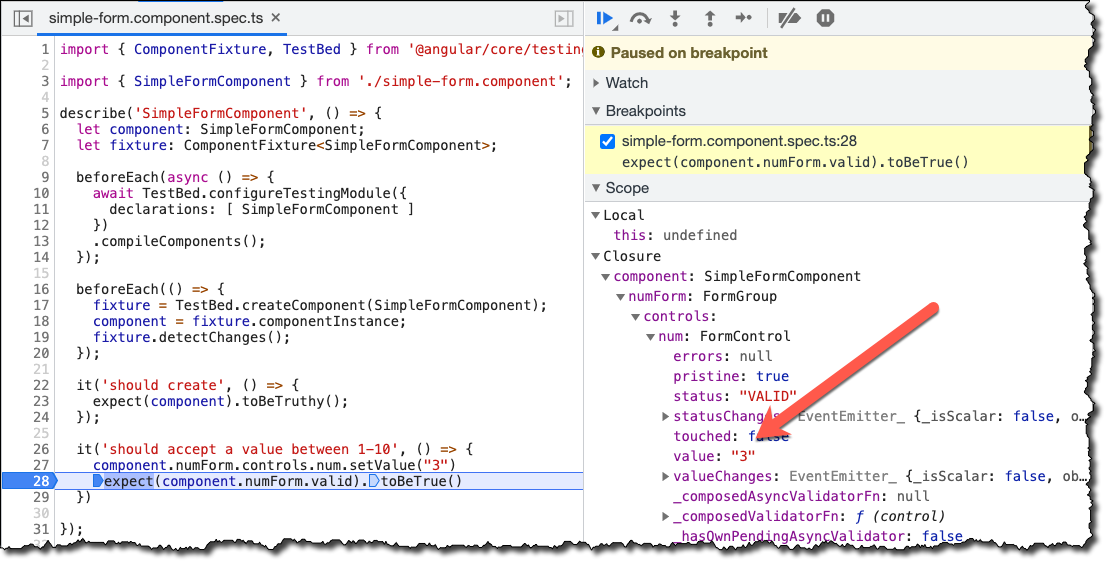
12. Refresh the browser and expand the Closure scope until you see that the value of the inout field is 3:
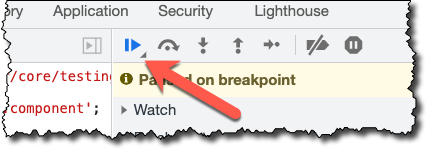
13. Use the debugger’s continue button to resume:
14. Enter Ctrl-C in the VS Code terminal to stop the test.
Part 5 – Create a More Complex Spec
In this part, you are going to create a spec that tests that verifies that the Submit button is enabled if the form is valid.
1. Open src>app>simple-form>simple-form.component.spec.ts
2. Add the following import:
import { By } from '@angular/platform-browser';
3. Add a new spec:
it('should enable the button if form is valid', () => {
  // make the form valid by setting a valid number
  component.numForm.controls.num.setValue("9")
  fixture.detectChanges();
  let buttonEL = fixture.debugElement.query(By.css("button"))
  expect(buttonEL.nativeElement.disabled ).toBeFalse()
})
4. Save the file.
5. Type the following command in the VS Code terminal to start the server and run Karma in Chrome.
ng test
6. You will see in the browser that the new spec fails:

7. Enter Ctrl-C in the VS Code terminal to stop the test.
You will debug this spec in the next part.
Part 6 – Debug a Spec in VS Code
In this part, you will configure the application so tests can be debugged in VS Code. Then you will use the debug feature to fix the spec from the previous part.
1. Open karma-config.js
2. Comment out the browsers entry:
// browsers: ,
3. Replace it with the following:
    browsers: ,
    customLaunchers: {
      ChromeHeadlessNoSandbox: {
        base: "ChromeHeadless",
        flags: [
          "--no-sandbox",
          "--user-data-dir=/tmp/chrome-test-profile",
          "--disable-web-security",
          "--remote-debugging-port=9222",
        ],
        debug: true,
      },
    },
4. Save the file.
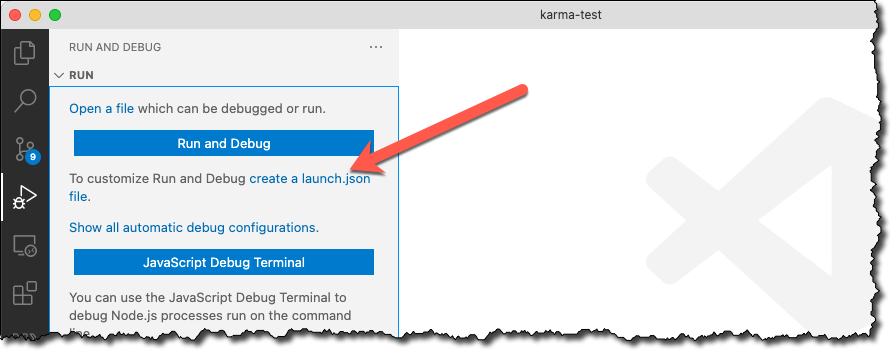
5. Press the debug button in VS Code:
6. Click on create a launch.json file and then select Chrome.
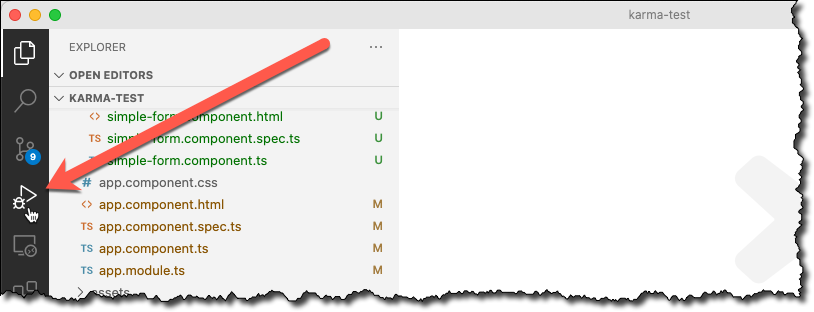
7. Press the Explorer button in VS Code:
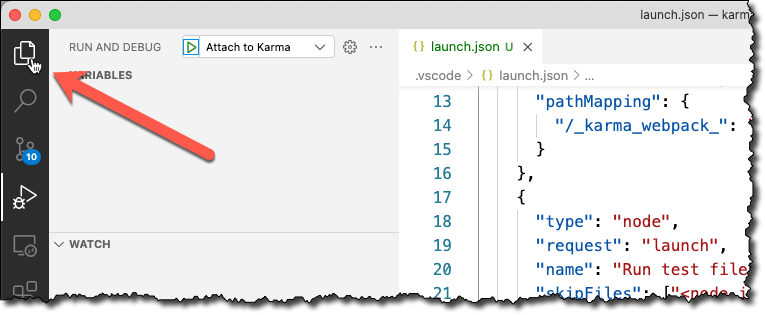
8. Open .vscode > launch.json

9. Replace the contents with the following:
    {
      "version": "0.2.0",
      "configurations": [
        {
          "type": "pwa-chrome",
          "request": "attach",
          "name": "Attach to Karma",
          "address": "localhost",
          "port": 9222,
          "timeout": 600000,
          "sourceMaps": true,
          "webRoot": "${workspaceFolder}",
          "pathMapping": {
            "/_karma_webpack_": "${workspaceFolder}"
          }
        },
        {
          "type": "node",
          "request": "launch",
          "name": "Run test file",
          "skipFiles": ["<node_internals>/**"],
          "console": "integratedTerminal",
          "program": "${workspaceFolder}/node_modules/.bin/ng",
          "args": ,
          "outFiles": ["${workspaceFolder}/**/*.js"]
        }
      ]
    }
10. Save the file.
11. Type the following command in the VS Code terminal to start the server and run Karma in Chrome.
ng test
You have not yet fixed the spec failure from the previous labs so 1 test failed and 5 succeeded
 12. Open src>app>simple-form>simple-form.component.spec.ts
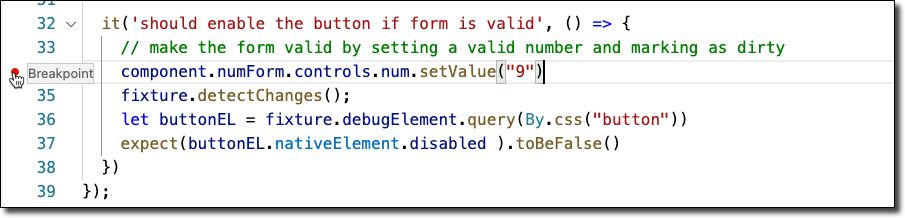
13. Click on the left side of the screen to put a breakpoint in the spec on the line that sets the form control value to 9:
 14. Press the debug button on the left side of the VS Code window and then click in the green arrow for Attach to Karma:

15. Use the controls at the top of the VS Code window to restart the test:
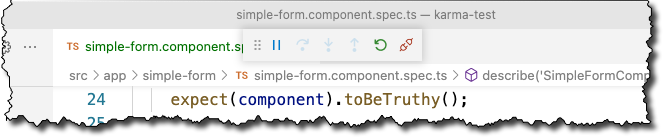
16. The test(s) will run until the breakpoint in your spec is reached.
17. Click step over three times.
18. In the Variable window, look at the following value:
Local > buttonEL > nativeElement > :button#submit-button >disabled


19. In the Variable window, now look at the following value:
Closure > component > numForm > status

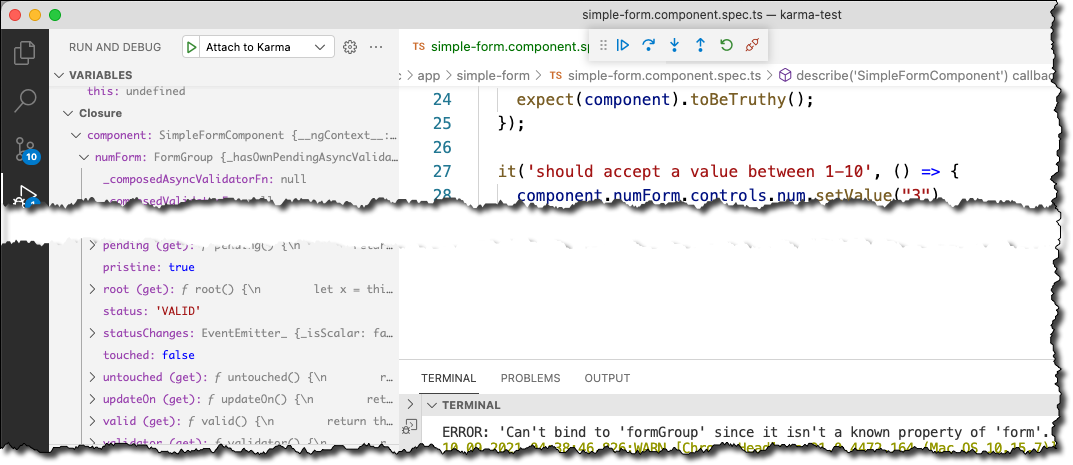
Even though the form is Valid the button is still disabled. The problem is that using setValue() on an input field does not change it from pristine to dirty. In the template you only enabled the submit button if the form was valid and the form was no longer pristine.
20. In the spec, add the following line below the line that sets the control value to 3 as shown in bold:
    component.numForm.controls.num.setValue("9")
    component.numForm.markAsDirty()
21. Save the file.
22. Use the controls at the top of the VS Code window to restart the test.
23. Switch to the Terminal tab.
24. You should now see 6 successful tests:
 25. Enter Ctrl-C in the VS Code terminal to stop the test and press Y.
26. Close all.
Part 7 – Review
In this tutorial, you created specs and debugged them in Chrome and VS Code.