This Introduction ArgoCD tutorial walks you through implementing GitOps principles into your organization to get the most out of your Kubernetes cluster administration.
For ArgoCD training for your team, please visit our GitOps Using ArgoCD course or Contact Us for Group Training Information.
1.1 What is ArgoCD?
- ArgoCD is a tool to implement the GitOps principles in your Kubernetes cluster administration.
- It is a product from the Argo project (https://argoproj.github.io/).
- Web site: https://argoproj.github.io/cd/
- Documentation: https://argo-cd.readthedocs.io/
1.2 Basic Workflow
- Step 1 – Define a Git repository in ArgoCD.
- Step 2 – Define an application. This points to a folder in the Git repo where YAML manifest files or Helm charts are stored.
- Step 3 – Synchronize the application. ArgoCD will fetch the manifest files and apply them to the Kubernetes cluster. You can enable automatic synchronization. With that in place, ArgoCD will constantly monitor the Git repo folder for changes.
1.3 Advantage of ArgoCD
- ArgoCD provides a user-friendly Web UI. This is a great way to monitor the status of the applications visually.
- Provides self-healing. Suppose any change is made accidentally or otherwise by using kubectl (and bypassing the GitOps process). In that case, ArgoCD will revert back those changes and restore the application to the way things are defined in the Git repo.
- Very lightweight installation.
- Provides a command line CLI tool for easy automation.
1.4 Installing ArgoCD
ArgoCD is very tightly coupled with Kubernetes. It does not use any database. Its runtime and configuration are entirely done using Kubernetes Custom Resource Definitions (CRD). This makes ArgoCD easy to install and very lightweight to run.
First, define a namespace called “argocd”. It is highly recommended that you use this namespace and not change it.
kubectl create namespace argocdNext, apply a manifest YAML to install ArgoCD.
kubectl apply -n argocd -fhttps://raw.githubusercontent.com/argoproj/argo-cd/stable/manifests/install.yaml
1.5 Access The Argo CD API Server
We need to enable HTTP access to the API server before accessing the Web UI. There are three different ways to do this:
- Using a load balancer.
- Port forwarding.
- Ingress.
To use the load balancer option, change the type of the argocd-server service to LoadBalancer.
kubectl patch svc argocd-server -n argocd -p '{"spec":
{"type": "LoadBalancer"}}'
If using minikube the start the tunnel. This is needed to get an external IP of the load balancer.
minikube tunnelGet the external IP of the argocd-server service.
kubectl get services -n argocd argocd-serverLaunch the Web UI using the URL http://<EXTERNAL IP>
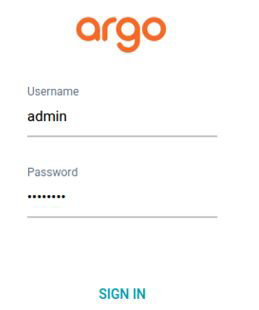
1.6 Log into the Web UI
- Get the default admin password.
kubectl -n argocd get secret argocd-initial-admin-secret \-o jsonpath="{.data.password}" | base64 -d; echo- Log in using user name admin and the default password.
1.7 Summary – Introduction ArgoCD tutorial
- ArgoCD is a tool to implement GitOps in your organization.
- ArgoCD runtime and configuration is entirely made out of Kubernetes custom resource definitions. No external database is used.
- To install ArgoCD in a cluster, simply apply the manifest YAML file.
- Enable HTTP access to the argocd-server service to be able to access the Web UI.