This tutorial is adapted from the Web Age course https://www.webagesolutions.com/courses/WA3204-introduction-to-kafka-for-c-developers.
In this tutorial, you will integrate Redis Cache with .NET Core 3.1 ASP.NET MVC.
Here is the overall architecture.
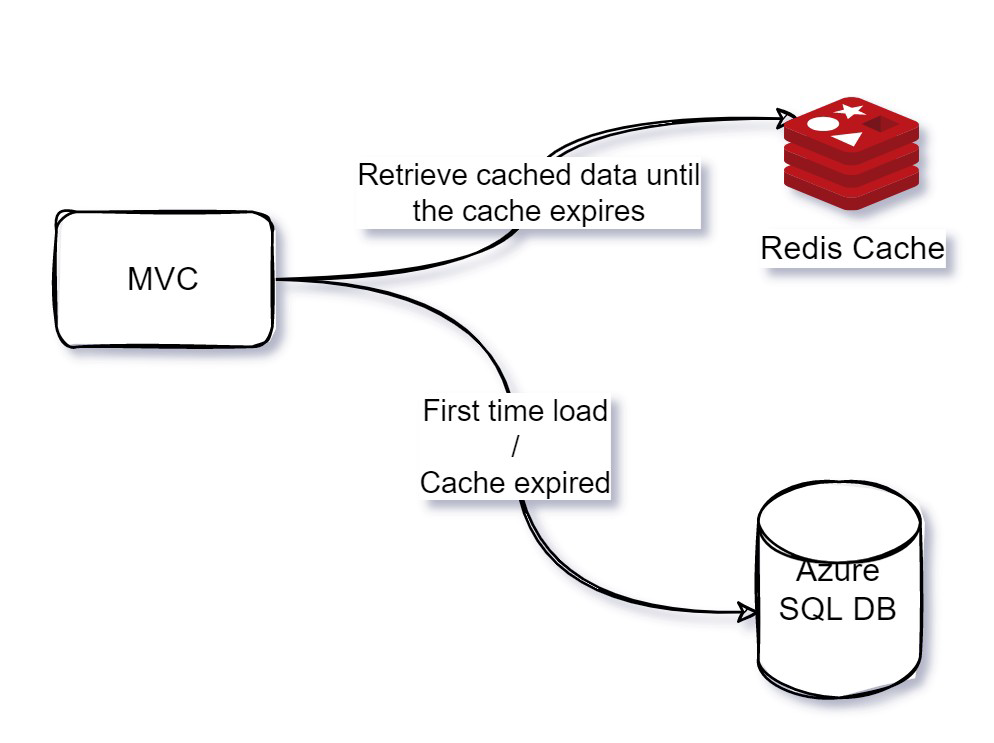
You will perform the following operations in the tutorial:
• Add Entity Framework support to an MVC application.
• Write logic to connect to Azure SQL database to insert and retrieve data.
• Test the application without caching data.
• Add the Redis cache support to the MVC application and cache data for one
minute.
• Test the application after enabling caching.
Part 1 – Setup
In this part, you will open a starter MVC project to which you will add the Redis Cache
support.
1. Using File Explorer, navigate to C:\LabFiles\redis-cache-lab-starter.zip and
extract it to C:\LabWorks\redis-cache-lab-starter
Download redis-cache-lab-starter.zip from the below link:
2. Ensure C:\LabWorks\redis-cache-lab-starter exists.
3. Open VSCode.
4. From the menu, click File → Open and select C:\LabWorks\redis-cache-lab
Take a moment to review Views\Home\Register.cshtml and Views\Home\Users.cshtml files. The file contents are commented out. You will modify the code later in the lab. These have been customized for you as part of the starter project. Register.cshtml is the same file you saw in the MVC frontend project. it will let you add more users to the system. Users.cshtml shows the list of existing users.
5. In VSCode, click Terminal → New Terminal to open a new terminal window.
Part 2 – Add Entity Framework to the MVC Project
In this part, you will add the Entity Framework support to the MVC project.
1. In the VSCode terminal window, execute the following commands to add the Entity Framework support to the project:
dotnet add package Microsoft.EntityFrameworkCore.SqlServer --version
dotnet add package Microsoft.EntityFrameworkCore.Design --version
dotnet tool install --global dotnet-ef --version 3.1.27
Note: The last command might error out saying that dotnet-ef is already installed. Ignore
the error.
2. Execute the following command to create a scaffolding on the Azure SQL table that you utilized in the previous lab.
dotnet ef dbcontext scaffold "<Your Azure SQL  Connection String>"
Microsoft.EntityFrameworkCore.SqlServer --table UserRegistration<Your Student Id> --output-dir Models
3. Ensure the following files are created in the Models folder:
KafkaLabContext.cs
UserRegistration<Your Student Id>.cs
Part 3 – Implement the Register POST Logic
In this part, you will implement the user registration POST logic so records can be added to the Azure SQL database.
1. In VSCode, open Controllers\HomeController.cs.
2. Locate the comment // TODO: Add the Register() Post method and add the
following code, make sure to update the <Your Student Id> with your ID:
// TODO: Add the Register() Post method
[HttpPost]
public IActionResult Register(UserRegistration
model)
{
try
{
using(var context = new KafkaLabContext())
{
model.UserId = Guid.NewGuid();
context.UserRegistration.Add(model);
context.SaveChanges();
ViewBag.Message = “User registered!”;
}
}
catch (Exception ex)
{
ViewBag.Message = ex.Message;
}
return View();
}
- Update the first line with your <Your Student Id> :
@model redis_cache_lab.Models.UserRegistration<Your Student Id> - In the terminal window, execute the following command to ensure there are no
syntax errors:
dotnet buildPart 4 – Implement the GET method to retrieve the user list
In this part, you will add the logic to retrieve the user list from the Azure SQL table without involve Redis Cache. You will add the Redis Cache functionality later in the lab.
1. In VSCode, open Controllers\HomeController.cs
2. Locate the Users method and modify it as shown in bold, make sure to update the <Your Student Id>
with your ID :
public IActionResult Users()
{
var context = new KafkaLabContext();
var users = context.UserRegistration<Your Student Id>.ToList();
ViewBag.Message = "Getting Data from Azure SQL";
return View(users);
}
3. In VSCode, open Views\Users.cshtml and uncomment the code. (Note: Only
remove the @* and *@ symbols. Do not remove the actual code.)
4. Update the first line with your <Your Student Id>:
@model IEnumerable<redis_cache_lab.Models.UserRegistration<Your Student Id>>
5. In the terminal window, execute the following code and ensure there are no errors:
dotnet build
Part 5 – Test the application without Redis Cache
In this part, you will test the application without Redis Cache. It will connect to the Azure
SQL database each time you refresh the page.
1. In the terminal window, execute the following command to start up the application:
dotnet watch run --urls=http://localhost:80802. Open Chrome and navigate to the following URL:
http://localhost:8080
3. Click Register.
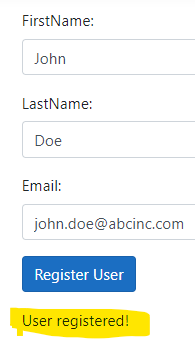
4. Enter new values (do not use previous value as they are already in the database) in to
the fields and click the Register User button.
5. Ensure the page shows the following message:
6. Click View Users.

Notice the user list shows up like this:

Also, notice the following message is displayed:

7. Try refreshing the page in the browser a few times. You will see the same message
that means you are hitting the Azure SQL database each time.
8. In the terminal window, press Ctrl+C to stop the application.
Part 6 – Obtain Redis Cache Connection Details
In this part, you will connect to the Azure portal and obtain information needed to
connect to Redis cache.
1. Using Chrome or Edge, navigate to the following URL:
portal.azure.com2. Sign in with your assigned credentials.
3. In the search bar on the top of the page, search for Azure Cache for Redis and click
on it.
4. Click the redis cache instance provided in the lab environment. For example:

5. In the navigation menu on the left hand side, click Settings | Access Keys.
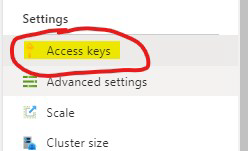
6. Click the copy button next to Primary connection string.

7. Save the value in notepad since you will use it later in the tutorial.
Part 7 – Add Redis Cache support to the MVC application
In this part, you will add the Redis Cache support to the MVC application so it doesn’t
connect to the Azure SQL database each time the page is refreshed.
1. In the terminal window, execute the following commands to install the Redis Cache and Newtonsoft.Json packages to the MVC application:
dotnet add package StackExchange.Redis --version 2.6.48
dotnet add package NewtonSoft.Json --version 13.0.1
2. In VSCode, open Controllers\HomeController.cs.
3. Below the existing using statements, add the following namespaces:
using StackExchange.Redis;
using Newtonsoft.Json;
4. In the HomeController.cs file, modify the existing Users method as shown in bold.
[Empty out the code inside the Users method so it looks like this]:
public IActionResult Users()
{
}
5. Inside the Users method, add the following code as shown in bold. (Note: Don’t
forget to use the actual redis cache connection string you obtained earlier in the lab):
public IActionResult Users()
{
var context = new KafkaLabContext();
var redisConnectionString = "";
var redisCache =
ConnectionMultiplexer.Connect(redisConnectionString).GetDatabase();
6. Below the above lines, add the following if-else block.
if(string.IsNullOrEmpty(redisCache.StringGet("Users")))
{
}
else
{
}
7. Inside the if block, add the following lines of code as shown in bold, make sure to
update the with your ID:
var message = "---Getting data from Azure SQL Database---";
var users = context.UserRegistration.ToList();
var serializedUsers = JsonConvert.SerializeObject(users);
redisCache.StringSet("Users", serializedUsers,
TimeSpan.FromMinutes(1));
Console.WriteLine(message);
ViewBag.Message = message;
return View(users);
These lines obtain data from Azure Sql and cache them for one minute in Redis cache.
8. Inside the else block, add the following code, make sure to update the with your ID:
var message = "---Getting data from Redis Cache---";
var cachedData =
JsonConvert.DeserializeObject>>(redisCache.StringGet("Users"));
Console.WriteLine(message);
ViewBag.Message = message;
return View(cachedData)
These lines get called when data is already available in Redis cache.
Part 8 – Test the application with Redis Cache
In this part, you will test the application with Redis Cache. It will connect to the Azure
SQL database if data isn’t already available in Redis cache or if the data has expired in
Redis cache.
1. In the terminal window, execute the following command to start up the application:
dotnet watch run --urls=http://localhost:80802. Open Chrome and navigate to the following URL:
http://localhost:80803. Click View Users.
Notice the user list shows up on the page. Also, notice the following message is
displayed:
---Getting data from Azure SQL Database---4. Refresh the page in the browser.
Notice the following message is displayed on the page.
---Getting data from Redis Cache---5. Refresh the page a few more times and notice the data is retrieved from the cache.
6. Click Register.
7. Enter new values in to the fields and click the Register User button.
8. Immediately switch back to the View Users page and notice the new record doesn’t
show up.
9. Wait for a minute or so and refresh the View Users page and notice the new record
shows up. You will also see the message that the records were retrieved from Azure SQL
and then they will get cached again for another minute.
Part 9 – Clean-up
1. In the VSCode terminal window, press Ctrl+C.
2. Close VSCode.
3. Close the browser window.
Part 10 – Review
In this tutorial, you integrated Redis cache with .NET Core 3.1 ASP.NET MVC application.