Disclaimer: You will need a specific setup and AWS account in order to follow all the steps in the tutorial. At Web Age, this setup is provided to students by setting up the VMs and sharing them with students. Sharing VMs in the blog is not possible as it is proprietary, but this tutorial will give you a good sense to understand the topic.
This tutorial is adapted from the Web Age course Terraform for AWS Training.
In this tutorial, you will learn to create an AWS VPS using Terraform.
Step 1: Create a new vpc.tf file
1. Create a new directory in your machine. Press Enter.
mkdir ~/terraform-vpc-demo
Change to the new directory. Press Enter.
cd ~/terraform-vpc-demo
2. Using your favorite editor (vi;nano;gedit) open a new empty file vpc.tf
gedit vpc.tf
3. Inside the file add the following lines to create a VPC
resource "aws_vpc" "main" { cidr_block = "10.0.0.0/16" instance_tenancy = "default" tags = { Name = "main" } }4. Review each line.
Step 2: Run Terraform init and see what changes.
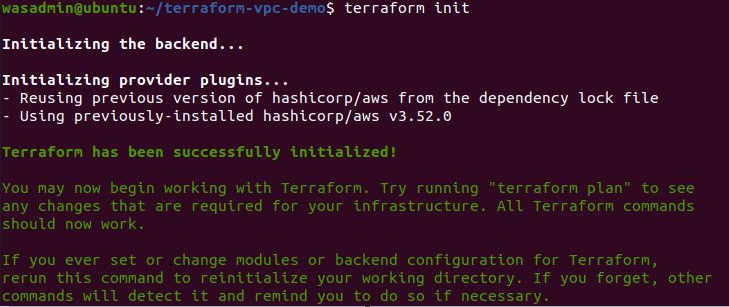
1. Enter terraform init and press Enter.
2. Run ll (these are lowercase Ls) and note that inside this directory there are now two additional objects: a .terraform directory and a .terraform.lock.hcl file.
3. Examine both the directory and the files and note the contents. This will get updated in a moment.
Step 3: Run Terraform plan and see what changes.
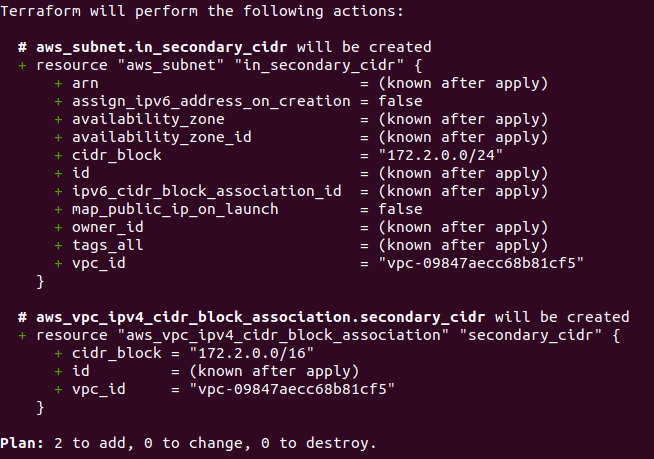
1. Enter terraform plan and press Enter.
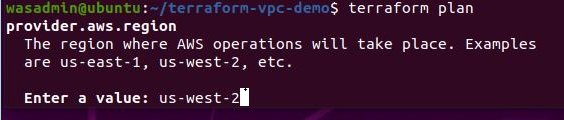
2. You will be prompted to add a region, use us-west-2
Review the plan that it shows you.
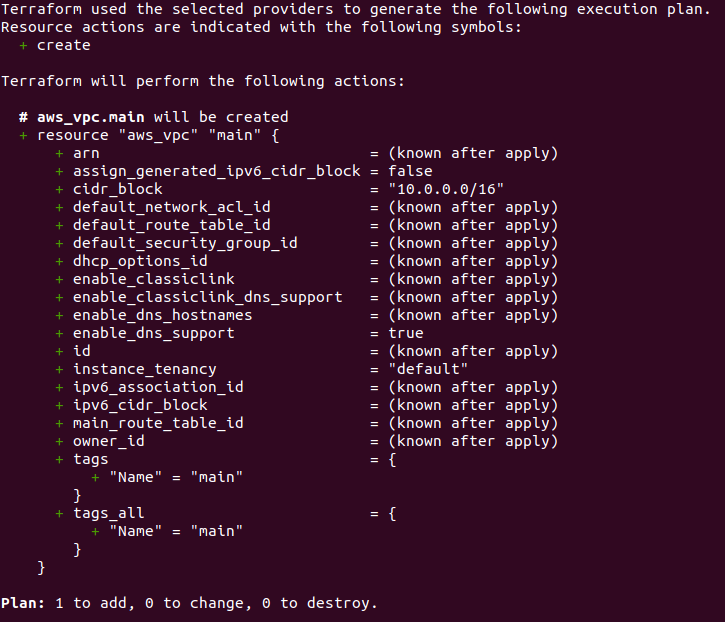
3. Consider the following questions:
- a. What does the green plus sign mean?
- b. How many additions, changes, or destroys is terraform planning?
- c. What cidr_block is the plan going to create?
- d. Is there a tag the resource?
Step 4: Run Terraform apply and verify what was done.
1. Enter terraform apply and press Enter. Enter the region as us-west-2

2. Enter yes when it asks for “Enter a value”:

3. It should show the same information as earlier in the plan stage. It will take a few minutes to run. Meanwhile, log into the AWS console.
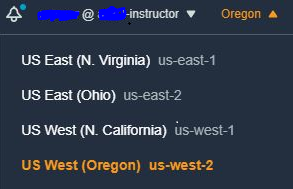
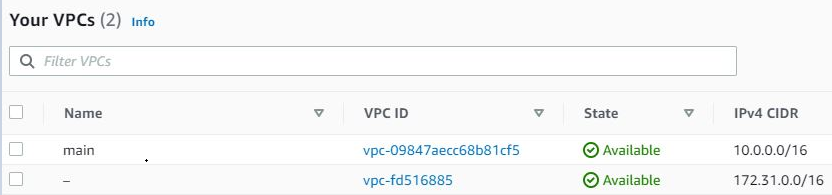
4. Go to VPC in the AWS console. Choose US-West (Oregon) for the region from the left-hand drop-down.
5. Click on Your VPCs. Do you see a main vpc label?
6. Now go back to the command line and look at the directory again. Do you see the following files:

Step 5: Change the configuration and rerun Terraform apply and verify what was done.

1. Now let us review what was added in the tfstate file. Remember this is our state of things and will be used to check for any changes or updates that might be made to the VPC.
2. Using your favorite editor (vi;nano;gedit) open the new terraform.tfstate file. Do not edit it. Just read it.
- a. What value is shown for the terraform version?
- b. What provider is identified in the file?
- c. What cidr_block is defined?
- d. What tags are shown?

3. Making changes to the VPC or any other setup is as simple as editing the vpc.tf file again.
Using your favorite editor (vi;nano;gedit) open a new empty file vpc.tf Lets enter the following code after the last closing } in the current file. Save it.
resource "aws_vpc_ipv4_cidr_block_association" "secondary_cidr" { vpc_id = aws_vpc.main.id cidr_block = "172.2.0.0/16" } resource "aws_subnet" "in_secondary_cidr" { vpc_id = aws_vpc_ipv4_cidr_block_association.secondary_cidr.vpc_id cidr_block = "172.2.0.0/24" }4. Now lets run the changes. Enter terraform apply, enter yes when prompted for the changes.
5. It will take a few minutes to run.
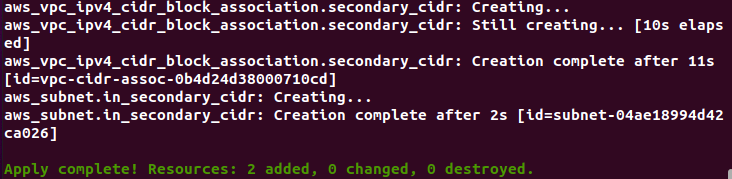
Meanwhile go back to the AWS console and verify that things are changing.
Note the new Ipv4 CIDR shown in the AWS VPC Console
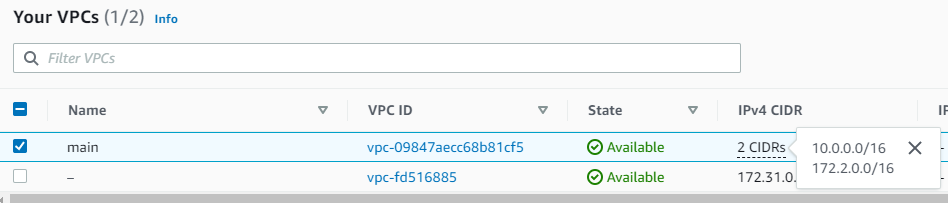
6. Switch to the AWS Subnet Console and view the subnet created. Notice it is tied to the main CIDR.
![]()
7. Open and read the terraform.tfstate file. Note the difference.
8. The aws cli tool also supports commands. You could type the following in the command prompt:
aws ec2 describe-vpcs
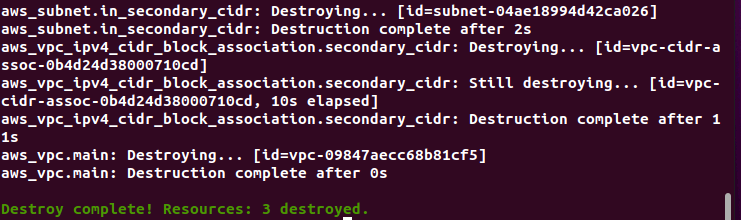
Step 6: Run terraform destroy
1. We will now remove all the changes we have made during this tutorial. Type the following and enter the region:
terraform destroy

2. It will take a few minutes to run. Don’t forget to say yes.
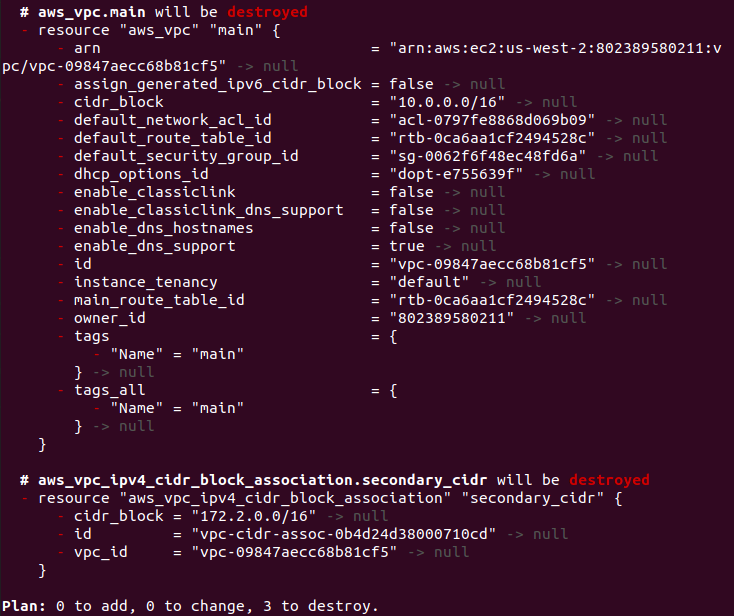

3. Go back to the AWS console and verify that the VPC and Subnet you created were deleted.
You should see confirmation in the console and from the command you ran.
4. Congratulation you have used Terraform to create, update and delete a VPC and a Subnet on AWS
Challenges for Terraform and VPC Networking
- 1. What if you wanted to create a VPC in a different region. What would you change?
- 2. How would you get it to create six subnets instead of the one?
- 3. What happens if you run terraform init multiple times in the same directory? terraform plan? Terraform apply?
- 4. Where would you go to lookup documentation on the AWS provider for terraform?
Step 6: Review
1. Close the Linux terminal
We have used Terraform on AWS to create a VPC in an AWS Region.