In this tutorial you will create a development setup that supports React development. The setup will take care of three essential issues:
-
Transpiling ES6 code
-
Transpiling JSX code
-
Serving React Application files ( index.html, etc. )
Node.js and npm should have been installed on your machine before you start working on this tutorial.
Part 1 – ES6 Transpilation support
In this part you will setup a development environment that transpiles ES6.
1. Open a command prompt.
2. Create a directory to work in named:
md C:\ReactWork
3. Create a directory “react-dev-env” inside the ReactWork directory:
md C:\ReactWork\react-dev-env
This directory will be referred to in the tutorial as the project root.
4. Navigate into the directory you just created:
cd C:\ReactWork\react-dev-env
5. Create a new package.json file using the following command (take defaults for all settings):
npm init
6. Use node package manager to install each of the following development dependencies into the project:
npm install babel-cli
npm install babel-preset-env
You may see some warnings about “optional dependencies”. It is ok to ignore them.
7. Navigate to the react-dev-env folder and open package.json file with any code editor.
8. Change the content of the file as follows:
{
  "name": "react-dev-env",
  "version": "1.0.0",
  "description": "",
  "main": "index.js",
  "scripts": {
    "babel": "babel src --out-dir dist",
    "babelw": "babel src --watch --out-dir dist"
  },
  "author": "",
  "license": "ISC",
  "devDependencies": {
    "babel-cli": "^6.26.0",
    "babel-preset-env": "^1.7.0"
  }
}
The first script runs babel once and then exits.
The second script runs babel in watch mode. In this mode it runs once and then stays active and runs again whenever files in the src directory change.
9. Save the file.
10. Create a “.babelrc” file in the project root with the following contents:
{ “presets”: [ } }] ] }
11. Save the file.
12. Create a “\src” directory in the project directory
13. Create a file named “test.js” in the “\src” directory.
14. Add some ES6 code to test.js file. The code below can be used, or you can add your own. When done save the file.
class myclass{
  constructor(name){this.name = name;}
  display(){console.log(this.name);}
}
new myclass("myclass").display();
15. Save the file.
16. Run the babel compiler using one of the scripts you added to package.json:
npm run babel
Babel will automatically create a “\dist” directory and place the transpiled version of “test.js” in it.
17. Check that babel did its job. ( test.js should have been created in the dist fodler)
18. Open \dist\test.js in and editor. The code you see should look like this:
var _createClass = function () { ... }();
function _classCallCheck(instance, Constructor) { if (!(instance instanceof Constructor)) { throw new TypeError("Cannot call a class as a function"); } }
var myclass = function () {
 function myclass(name) {
    _classCallCheck(this, myclass);
    this.name = name;
  }
  _createClass(myclass, );
  return myclass;
}();
new myclass("myclass").display();
This is the result of the ES6 transpilation.
What you see here is pure ES5 code which can be run directly in a browser. The “_createClass” method referenced in the code refers to a helper function inserted by the transpiler itself which is used to help create the ES5 based class.
This is NOT the same thing as React.createClass() which is a function available in earlier versions of React that was used to create React class-based components and which has since been deprecated in favor of using ES6 classes and a transpiler.
19. Use node.js to run the test file:
node dist\test.js
The output should be:
myclass
The current setup is suitable for development of standalone JavaScript code that uses ES6 and needs to be compiled to ES5. In the next part we will add JSX transpilation.
Part 2 – JSX Transpilation support
In this part you will add JSX transpilation support to the development environment.
1. Use node package manager to install the following packages into the project:
npm install react --save
npm install react-dom --save
npm install prop-types --save
2. Use node package manager to install the following development dependencies into the project:
npm install babel-preset-react --save-dev
3. Open the “.babelrc” file.
4. Add “react” to the “.babelrc” file as shown in bold:
{ "presets": [
    "react",
     } }]
   ]
}
5. Save the file.
6. Create a basic index.html file in the project root with the following contents:
<!doctype html>
<html>
<head>
<title>My React Project</title>
</head>
<body>
</body>
</html>
7. Save the file.
8. Modify the index.html file:
-
Add <script> tags to the <head> section to include the react and react-dom JavaScript libraries.
-
Add a <div> to the body with “id=main”
-
Add a <script> tag just before the ending </body> tag to include an ‘app.js’ file from the “dist” directory.
-
Save index.html
9. When you are done your index.html file should look something like this:
<!doctype html>
<html>
<head>
<title>My React Project</title>
<script src="node_modules/react/umd/react.development.js"></script>
<script src="node_modules/react-dom/umd/react-dom.development.js"></script>
</head>
<body>
<div id="react-container"></div>
<script src="dist/app.js"></script>
</body>
</html>
10. Save the file.
11. Create an “app.js” file in the “\src” directory with the following contents:
ReactDOM.render(
    <h3>My App Title</h3>,
    document.getElementById('react-container'));
12. Save the file.
13. Run the babel compiler:
npm run babel
Note: running “babelw” instead of “babel” will open it in “watch” mode. In “watch” mode babel will stay active after it runs and will run again every time you save changes to your files.
14. Check that babel did its job. Open the transpiled file from the dist directory in an editor:
\dist\app.js
15. You should notice that the content from the original file that appeared like this:
<h3>My App Title</h3>
Now appears like this in \dist\app.js
React.createElement(
 'h3',
  null,
 'My App Title'
)
This is the result of React JSX transpilation.
16. Open index.html from the file system in the Chrome browser. The page should show “My App Title”.
Some application operations require the index.html to be served from a file server instead of directly from the file system. In the next part we will add a development server to the setup.
Part 3 – File Server Support
In this part you will add a development file server to the setup.
1. Use node package manager to install the following development dependencies into the project:
npm install http-server --save-dev
2. Open package.json file.
3. Add the following script to the package.json file before the other scripts:
"start": "http-server",
4. Save the file.
5. Start the server:
npm start
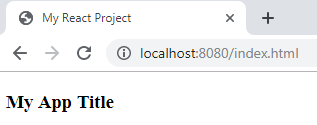
6. Open index.html in the Chrome browser using the following url:
http://localhost:8080/index.html
The page should load as before but this time from the development file server.
 7. Close all open files.
8. Close the browser.
9. Stop the server by CTRL+C and close the command prompt window.
Part 4 – Review
In this tutorial, you have created a development setup that:
-
Transpiles ES6 code
-
Transpiles JSX code
-
Serves React Application files ( index.html, etc. )