Multipart Upload Overview
The Multipart upload API enables you to upload large objects in parts.
Multipart uploading is a three-step process:
◊ You initiate the upload
◊ you upload the object parts
◊ after you have uploaded all the parts, you complete the multipart upload.
Upon receiving the complete multipart upload request, Amazon S3 constructs the object from the uploaded parts. You can list of all your in-progress multipart uploads or get a list of the parts that you have uploaded for a specific multipart upload. Once you initiate a multipart upload, Amazon S3 retains all the parts until you either complete or abort the upload.Throughout its lifetime, you are billed for all storage, bandwidth, and requests for this multipart upload and its associated parts. If you abort the multipart upload, Amazon S3 deletes upload artifacts and any parts that you have uploaded, and you are no longer billed for them.
Multipart Upload Initiation
When you send a request to initiate a multipart upload, Amazon S3 returns a response with an upload ID, which is a unique identifier for your multipart upload. You must include this upload ID whenever you upload parts, list the parts, complete an upload, or abort an upload.
Parts Upload
When uploading a part, in addition to the upload ID, you must specify a part number. You can choose any part number between 1 and 10,000. A part number uniquely identifies a part and its position in the object you are uploading. The part number you choose need not be a consecutive sequence (for example, it can be 1, 5, and 14). If you upload a new part using the same part number as a previously uploaded part, the previously uploaded part is overwritten.
Multipart Upload Completion/Abort
Only after you either complete or abort a multipart upload will Amazon S3 free up the parts storage and stop charging you for the parts storage. When you complete a multipart upload, Amazon S3 creates an object by concatenating the parts in ascending order based on the part number. If any object metadata was provided in the initiate multipart upload request, Amazon S3 associates that metadata with the object. Your complete multipart upload request must include the upload ID and a list of both part numbers. Amazon S3 response includes an ETag that uniquely identifies the combined object data. You can optionally abort the multipart upload. After aborting a multipart upload, you cannot upload any part using that upload ID again.
Multipart Upload Listings
You can list the parts of a specific multipart upload or all in-progress multipart uploads. The list parts operation returns the parts information that you have uploaded for a specific multipart upload. For each list parts request, Amazon S3 returns the parts information for the specified multipart upload, up to a maximum of 1,000 parts. If there are more than 1,000 parts in the multipart upload, you must send a series of list part requests to retrieve all the parts. The returned list of parts doesn’t include parts that haven’t completed uploading.
Concurrent Multipart Upload Operations
In a distributed development environment, it is possible for your application to initiate several updates on the same object at the same time. Your application might initiate several multipart uploads using the same object key. For each of these uploads, your application can then upload parts and send a complete upload request to Amazon S3 to create the object.
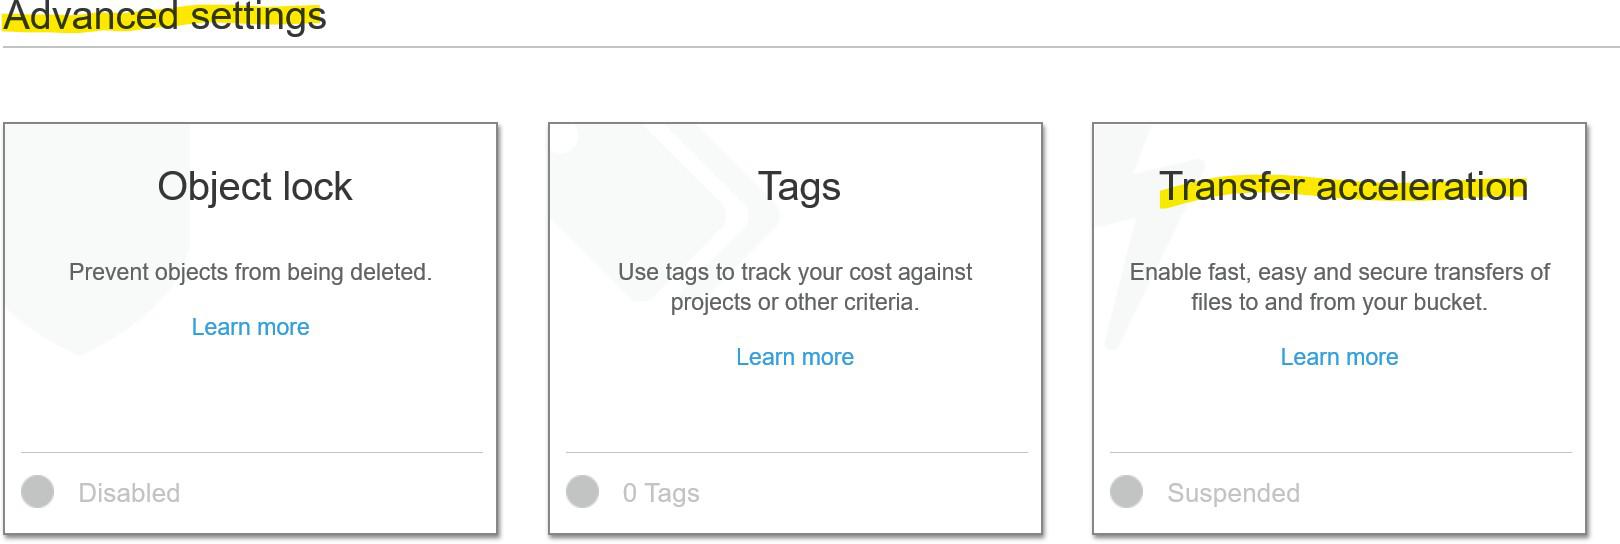
Amazon S3 Transfer Acceleration
Amazon S3 Transfer Acceleration enables fast, easy, and secure transfers of files over long distances between your client and an S3 bucket. Transfer Acceleration takes advantage of Amazon CloudFront’s globally distributed edge locations. As the data arrives at an edge location, data is routed to Amazon S3 over an optimized network path. When using Transfer Acceleration, additional data transfer charges may apply. You pay only for what you use. There is no minimum fee. You can check Pricing calculator here : https://calculator.aws/#/
Why Use Amazon S3 Transfer Acceleration
You have customers that upload to a centralized bucket from all over the world. You transfer gigabytes to terabytes of data on a regular basis across continents. You are unable to utilize all of your available bandwidth over the Internet when uploading to Amazon S3.
Using the Amazon S3 Transfer Acceleration Speed Comparison Tool
https://s3-accelerate-speedtest.s3- accelerate.amazonaws.com/en/accelerate-speed-comparsion.html.
 You can copy the following URL into your browser window, replacing region with the region that you are using (for example, us-west-2) and yourBucketName with the name of the bucket that you want to evaluate:
http://s3-accelerate-speedtest.s3-accelerate.amazonaws.com/en/accelerate-speed-comparsion.html?region=region&origBucketName=yourBucketName
Requirements for Using Amazon S3 Transfer Acceleration
The name of the bucket used for Transfer Acceleration must be DNS- compliant and must not contain periods (“.”). Transfer Acceleration must be enabled on the bucket. After enabling Transfer Acceleration on a bucket it might take up to thirty minutes before the data transfer speed to the bucket increases. To access the bucket that is enabled for Transfer Acceleration, you must use the endpoint bucketname s3-accelerate.amazonaws.com. or the dual- stack endpoint bucketname s3-accelerate.dualstack.amazonaws.com to connect to the enabled bucket over IPv6. You must be the bucket owner to set the transfer acceleration state. The bucket owner can assign permissions to other users to allow them to set the acceleration state on a bucket.
- The s3:PutAccelerateConfiguration permission permits users to enable or disable Transfer Acceleration on a bucket.
- The s3:GetAccelerateConfiguration permission permits users to return the Transfer Acceleration state of a bucket, which is either Enabled or Suspended.
Using Amazon S3 Transfer Acceleration
To get started using Amazon S3 Transfer Acceleration, you need to enable the Acceleration option
◊ Using the console
 ◊ Using the CLI
$ aws s3api put-bucket-accelerate-configuration –bucket bucketname –accelerate-configuration Status=Enabled
You can use the accelerate endpoint per command by setting the –endpoint-url parameter to https://s3-accelerate.amazonaws.com or http://s3-accelerate.amazonaws.com for any s3 or s3api command.
◊ Regular end-point:
s3 cp file.txt s3://bucketname/keyname –region region–endpoint-url http://s3.amazonaws.com
◊ Acceleration-enabled end-point:
s3 cp file.txt s3://bucketname/keyname –region region–endpoint-url http://s3.amazonaws.com
AWS Snowball
Snowball is a petabyte-scale data transport solution that uses devices designed to be secure to transfer large amounts of data into and out of the AWS Cloud. Customers today use Snowball to migrate analytics data, genomics data, video libraries, image repositories, backups, and to archive part of data center shutdowns, tape replacement or application migration projects. Transferring data with Snowball is simple, fast, more secure, and can be as little as one-fifth the cost of transferring data via the high-speed Internet. With Snowball, you don’t need to write any code or purchase any hardware to transfer your data.
How AWS Snowball Works?
-
 Create a job in the AWS Management Console and a Snowball device will be automatically shipped to you. Once it arrives, attach the device to your local network, download and run the Snowball Client to establish a connection. Use the Client to select the file directories that you want to transfer to the device. The Client will then encrypt and transfer the files to the device at high speed. Once the transfer is complete and the device is ready to be returned, the E Ink shipping label will automatically update and you can track the job status via Amazon Simple Notification Service (SNS), text messages, or directly in the Console.

Benefits of AWS Snowball
-
High speed – For example, 100 terabytes of data will take more than 100 days to transfer over a dedicated 1 Gbps connection. That same transfer can be accomplished in less than one week, plus shipping time, using two Snowball devices.
-
Extremely scalable – A single Snowball device can transport multiple terabytes of data and multiple devices can be used in parallel to transfer petabytes of data into or out of an Amazon S3 bucket.
-
Tamper resistant and secure – Snowball devices use tamper-resistant enclosures, 256-bit encryption, and an industry-standard Trusted Platform Module (TPM) designed to ensure both security and full chain-of-custody for your data. Encryption keys are managed with the AWS Key Management Service (KMS), and they are never sent to, or stored on the device.
-
Simple and compatible – The AWS Snowball is simple to connect to your existing networks and applications.
◊ You can initiate a Snowball request through the AWS Management Console. Once the device is on-premise, you can connect to it through industry-standard network interfaces and storage protocols (HDFS, the S3 API and the S3 CLI).
◊ Once the data transfer is complete, the E Ink shipping label automatically updates so that your carrier can return it to the correct AWS facility.
-
Low cost – Data can be transferred using two Snowball devices for as little as one-fifth the cost of using the Internet.
-
Easy data retrieval – Snowball offers customers a fast and inexpensive way to ensure data can be quickly transferred both into and out of AWS.
AWS Snowball – Use Cases
-
Cloud migration – If you have large quantities of data you need to migrate into AWS, Snowball is often much faster and more cost-effective than transferring that data over the Internet.
-
Disaster recovery – In the event that you need to quickly retrieve a large quantity of data stored in Amazon S3, Snowball devices can help retrieve the data much quicker than high-speed Internet.
-
Datacenter decommission – Snowball can help ensure that your data is securely and cost-effectively transferred to AWS during this process.
-
Content distribution – Use Snowball devices if you regularly receive or need to share large amounts of data with clients, customers, or business associates. Snowball devices can be sent directly from AWS to client or customer locations.
Import Data into Amazon S3 with AWS Snowball
-
Access AWS Snowball: https://console.aws.amazon.com/importexport
-
The process for importing data into Amazon S3 with Snowball has the following steps.
◊ Create an Import Job
◊ Receive the AWS Snowball device
◊ Connect the AWS Snowball device to Your Local Network
◊ Transfer Data
◊ Return the device
◊ Monitor the Import Status
AWS Snowball Job Types
-
There are two different job types:
◊ import jobs
◊ export jobs.
Import into Amazon S3
An import job is the transfer of 80 TB or less of your data (located in an on-premises data source), copied onto a single Snowball, and then moved into Amazon S3. For import jobs, Snowballs and jobs have a one-to-one relationship, meaning that each job has exactly one Snowball associated with it. If you need additional Snowballs, you can create new import jobs or clone existing ones. Your data source for an import job should be on-premises. You can import any number of directories, files, and objects for each import job, provided the amount of data you’re importing fits within a single Snowball. In the US regions, Snowballs come in two sizes: 50 TB and 80 TB. All other regions have 80 TB Snowballs only. When you import files, each file becomes an object in Amazon S3 and each directory becomes a prefix. If you import data into an existing bucket, any existing objects with the same names as newly imported objects will be overwritten. When the import has been processed and verified, AWS performs a complete erasure of the Snowball. This erasure follows the (NIST) 800-88 standards. After your import is complete, you can download a job report. This report alerts you to any objects that failed the import process. You can find additional information in the success and failure logs.
Export from Amazon S3
An export job is the transfer of any amount of data (located in Amazon S3), copied onto any number of Snowballs, and then moved one Snowball at a time into your on-premises data destination. When you create an export job, it’s split into job parts. Each job part is no more than 80 TB in size, and each job part has exactly one Snowball associated with it. Your data source for an export job is one or more Amazon S3 buckets. Once the data for a job part is moved from Amazon S3 to a Snowball, you can download a job report. This report will alert you to any objects that failed the transfer to the Snowball. You can find more information in your job’s success and failure logs. Snowballs for an export job’s job parts are delivered one after another, with subsequent Snowballs shipping out to you once the previous job part has entered the In transit to AWS status. When AWS receives a returned Snowball, AWS perform a complete erasure of the Snowball. This erasure follows the NIST 800-88 standards.
Job Details
Each import or export job for Snowball is defined by the details that you specify when it’s created.
-
Job name – A name for the job, containing alphanumeric characters, spaces, and any Unicode special characters.
-
Job type – The type of job, either import or export.
-
Job ID – A unique 39-character label that identifies your job. The job ID appears at the bottom of the shipping label that appears on the E Ink display, and in the name of a job’s manifest file.
-
Created date – The date that you created this job.
-
Shipping speed – Speed options are based on region. For more information, see Shipping Speeds.
-
IAM role ARN – This Amazon Resource Name (ARN) is the AWS Identity and Access Management (IAM) role that is created during job creation with write permissions for your Amazon S3 buckets
-
AWS KMS key – In Snowball, AWS Key Management Service (AWS KMS) encrypts the keys on each Snowball.
-
Snowball capacity – In the US regions, Snowballs come in two sizes: 50 TB and 80 TB. All other regions have the 80 TB Snowballs only.
-
Storage service – The AWS storage service associated with this job, in this case, Amazon S3.
-
Resources – The AWS storage service resources associated with your job. In this case, these are the Amazon S3 buckets that your data is transferred to or from.
Job Statuses
-
Job created – Your job has just been created. This status is the only one during which you can cancel a job or its job parts, if the job is an export job.
-
Preparing Snowball – AWS is preparing a Snowball for your job.
-
Exporting – AWS is exporting your data from Amazon S3 onto a Snowball.
-
Preparing shipment – AWS is preparing to ship a Snowball to you.
-
In transit to you – The Snowball has been shipped to the address you provided during job creation.
-
Delivered to you – The Snowball has arrived at the address you provided during job creation.
-
In transit to AWS – You have shipped the Snowball back to AWS.
-
At sorting facility – The device for this job is at our internal sorting facility. Any additional processing for import jobs into Amazon S3 will begin soon, typically within 2 days.
-
At AWS – Your shipment has arrived at AWS. If you’re importing data, your import typically begins within a day of its arrival.
-
Importing – AWS is importing your data into Amazon Simple Storage Service (Amazon S3).
-
Completed – Your import job or export job part has completed successfully.
-
Canceled – Your job has been canceled. You can only cancel Snowball import jobs during the Job created status.
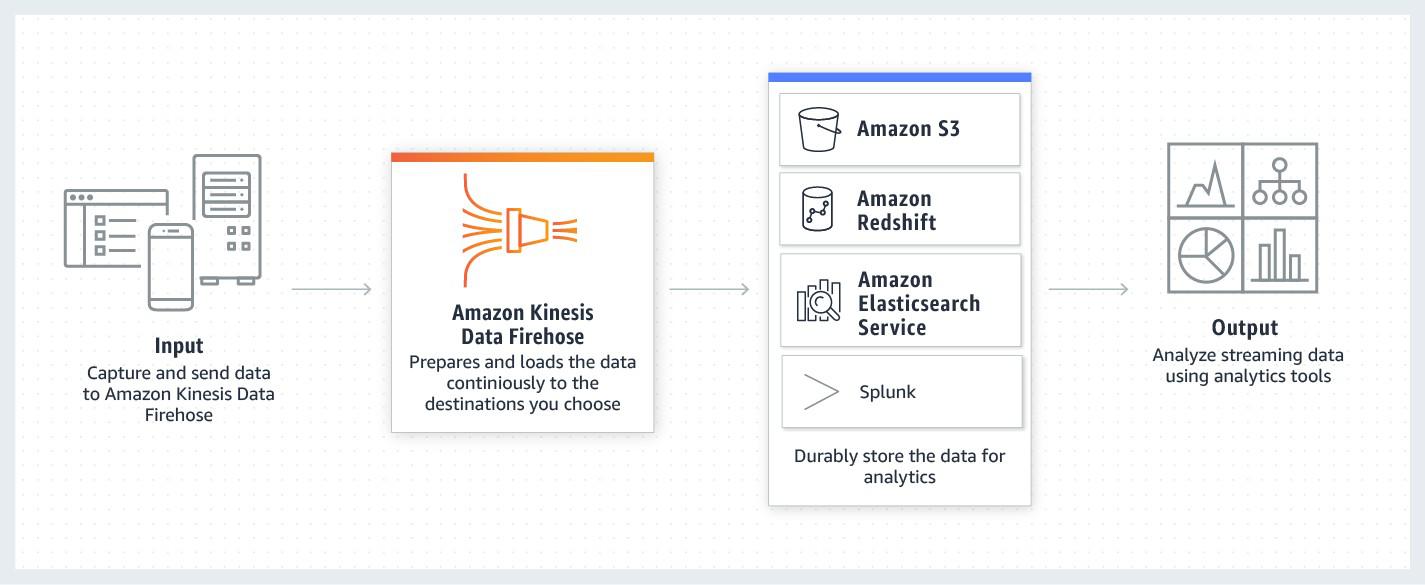
Amazon Kinesis Data Firehose
Amazon Kinesis Data Firehose is the way to reliably load streaming data into data stores and analytics tools. It can capture, transform, and load streaming data into Amazon S3, Amazon Redshift, Amazon Elasticsearch Service, and Splunk, enabling near real-time analytics with existing business intelligence tools and dashboards. It is a fully managed service that automatically scales to match the throughput of your data and requires no ongoing administration. It can also batch, compress, transform, and encrypt the data before loading it, minimizing the amount of storage used at the destination and increasing security. You can also configure your delivery stream to automatically convert the incoming data to columnar formats like Apache Parquet and Apache ORC, before the data is delivered to Amazon S3, for cost-effective storage and analytics.
Benefits of Amazon Kinesis Data Firehose
-
Easy to use – Amazon Kinesis Data Firehose provides a simple way to capture, transform, and load streaming data with just a few clicks in the AWS Management Console.
◊ You can create a Firehose delivery stream, select the destinations, and you can start sending real-time data from hundreds of thousands of data sources simultaneously.
◊ The service takes care of stream management, including all the scaling, sharding, and monitoring, needed to continuously load the data to destinations at the intervals you specify.
-
Integrated with AWS data stores – Amazon Kinesis Data Firehose is integrated with Amazon S3, Amazon Redshift, and Amazon Elasticsearch Service.
-
Serverless data transformation – Amazon Kinesis Data Firehose enables you to prepare your streaming data before it is loaded to data stores.
◊ With Kinesis Data Firehose, you can easily convert raw streaming data from your data sources into formats required by your destination data stores, without having to build your own data processing pipelines.
-
Near real-time – Amazon Kinesis Data Firehose captures and loads data in near real-time.
◊ It loads new data into Amazon S3, Amazon Redshift, Amazon Elasticsearch Service, and Splunk within 60 seconds after the data is sent to the service.
-
No ongoing administration – Amazon Kinesis Data Firehose is a fully managed service which automatically provisions, manages and scales compute, memory, and network resources required to load your streaming data.
-
Pay only for what you use – With Amazon Kinesis Data Firehose, you pay only for the volume of data you transmit through the service, and if applicable, for data format conversion. There are no minimum fees or upfront commitments.
How Amazon Kinesis Data Firehose Amazon Kinesis Data Firehose – Use Cases
-
IoT analytics – With Amazon Kinesis Data Firehose, you can capture data continuously from connected devices such as consumer appliances, embedded sensors, and TV set-top boxes.
-
Clickstream analytics – You can use Amazon Kinesis Data Firehose to enable delivery of real-time metrics on digital content, enabling authors and marketers to connect with their customers in the most effective way.
-
Log analytics – Log data from your applications and servers running in the cloud and on-premises can help you monitor your applications and troubleshoot issues quickly.
◊ For example, you can detect application errors as they happen and identify root cause by collecting, monitoring, and analyzing log data.
◊ You can visualize and analyze the data with Kibana.
-
Security monitoring – Kinesis Data Firehose supports Splunk as a destination.
◊ With this solution, you can Monitor network security in real-time and alert when a potential threat arises.
Summary
The Multipart upload API enables you to upload large objects in parts. Amazon S3 Transfer Acceleration enables fast, easy, and secure transfers of files over long distances between your client and an S3 bucket. Snowball is a data transport solution that uses devices designed to be secure to transfer large amounts of data into and out of the AWS Cloud. Amazon Kinesis Data Firehose is the way to reliably load streaming data into data stores and analytics tools.