In this tutorial, we will learn how to deploy an application using Flux.
Part 1 – Install Flux
We will now install Flux.
1. Run this command to install Flux:
curl -s https://fluxcd.io/install.sh | sudo bash

[Enter wasadmin for password]
We will now configure Flux. This does mainly two things:
- Installs various components inside Kubernetes. This is how the Flux system actually runs.
- Create a GitHub repo where all Flux configuration files are stored.
Part 2 – Bootstrap Flux
The bootstrapping process does mainly two things:
- Creates a GitHub repo that stores Flux’s own configuration YAML files.
- Installs various components like services and pods within K8s that run the Flux code.
1. Open the text file with your saved GitHub PAT and copy the token.
2. Export these two shell variables. This is how Flux finds out your GitHub credentials:
export GITHUB_TOKEN=<PAT>
export GITHUB_USER=<YOUR GITHUB USER ID>
[Replace <PAT> with your GitHub personal access token and
<YOUR GITHUB USER ID> with your GitHub user]
3. Run this command to make sure all prerequisites are met:
flux check --pre
4. Run this command to configure Flux. Be patient, this command can take about 5 minutes to complete:
flux bootstrap github \
  --owner=$GITHUB_USER \
  --repository=flux-documents \
  --branch=main \
  --path=./clusters/my-cluster \
  --personal
| Parameter | Explanation |
| –repository | The name of the Git repo that will be created. |
| –branch | The branch where the files will be committed. |
| –path | A folder in the repo where the config files will be added. This option lets you store the files for multiple clusters in the same repo. |
| –personal | A private repo will be created. |
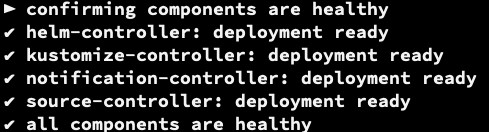
If all goes well, you should see all components as healthy.
Note: The GITHUB_TOKEN and GITHUB_USER variables are only used during the bootstrap process. You won’t need them from now on.
Troubleshooting:
If you see a 401 Bad credentials as below means that your PAT is wrong.

Part 3 – Review Flux GitHub Repo
The bootstrapping process has created a repo for us. Flux has pushed yaml files that are needed to install its own components. Let’s review them.
1. From the bootstrap output copy the URL to the repo. An example is shown below:

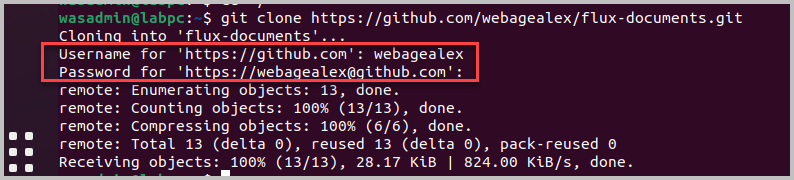
2. Clone the repo:
cd ~/
git clone https://github.com//flux-documents.git
[You will be requested to provide credentials, enter your user name and as password you need to enter your PAT] Example:
Open GitHub and then go to the home page.
4. You should see under Recent Repositories the flux-documents repository. Click on
it to open it or open the Repositories page.
5. Click clusters/my-cluster/flux-system folder.

You will see these files:
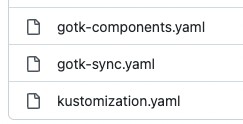
These files install a few components in K8s. Let’s review these components.
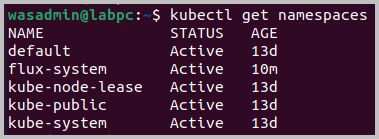
7. Run this command to note that a new namespace called flux-system was added:
kubectl get namespaces
You should see:
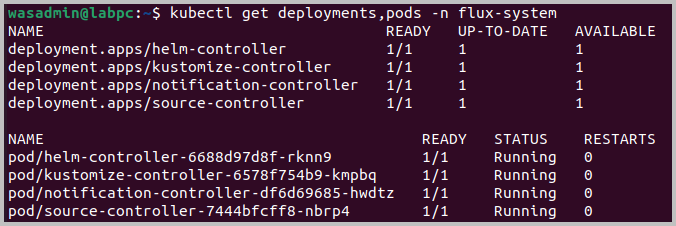
Run this command to view the new deployments and pods added by Flux. Flux itself
executes using them:
kubectl get deployments,pods -n flux-system
You should see:
Part 4 – Prepare the Application for Flux Based Deployment
We will now add the yaml file that defines the deployment and service for our demo app.
We will then tell Flux to monitor these files and look for any updates. Flux will detect any changes to these files and automatically apply them to K8s. The process of defining what deployment, service etc. you need for an application is called customization.
1. In the folder where you have cloned gitops-demo-webapp, create a subfolder called
flux-config:
cd ~/gitops-demo-webapp
mkdir flux-config
cd flux-config
2. Copy the deployment.yaml file used earlier to this new folder. You can also get it from below link.
No change is required to this file:
cp ~/LabFiles/deployment.yaml .
Now we need to tell Flux which files it should pull and apply to K8s.
3. In the flux-config folder, create a file called kustomization.yaml. Note: The file must be called kustomization.yaml.
gedit kustomization.yaml
Enter the following lines to that file:
apiVersion: kustomize.config.k8s.io/v1beta1
kind: Kustomization
resources:
– deployment.yaml
A list of files is listed under the resources node. In our case we have only one file – deployment.yaml.
5. Save changes and close the file.
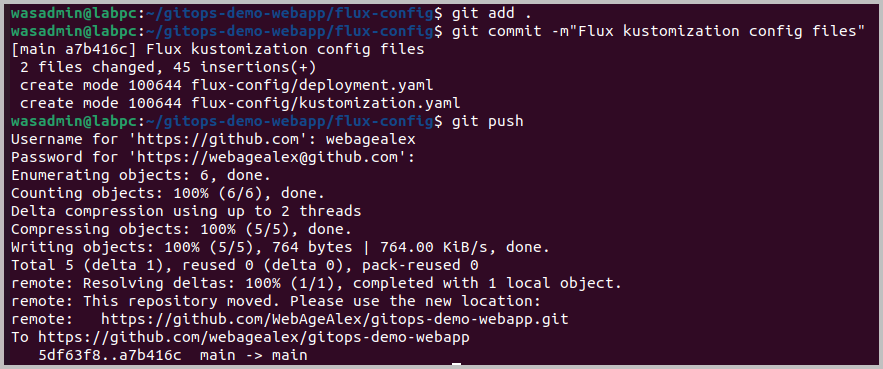
6. Commit and push these files. Don’t forget to use your GitHub PAT for the password when asking for user and password:
git add .
git commit -m"Flux kustomization config files"
git push

[You will be requested to provide credentials, enter your user name and as password you need to enter your PAT]
You should see something like:
Part 5 – Configure Flux for Our Application
We will now tell where our application’s “kustomization” files are located.
1. In the flux-documents repo, go inside the clusters/my-cluster folder:
cd ~/flux-documents/clusters/my-cluster
2. In that folder create a file for our application called gitops-demo.yaml:
gedit gitops-demo.yaml
3. In the gitops-demo.yaml file we will tell Flux the location of our application’s GitHub repo. Add these lines to that file. Here, <YOUR GITHUB USER ID> should be replaced with your own user ID:
apiVersion: source.toolkit.fluxcd.io/v1beta2
kind: GitRepository
metadata:
  name: gitops-demo-webapp
  namespace: flux-system
spec:
  interval: 30s
  ref:
    branch: main
  url: https://github.com/<YOUR GITHUB USER ID>/gitops-demo-webapp
Main settings are as follows.
| Key name | Explanation |
| metadata/name | This is the name we give the GitHub repo. We can then refer to it from other YAML file. |
| namespace | This is where the above name will be defined. |
| url | The URL to the application’s GitHub repo. |
4. Save and close the file.
We will now tell Flux where the kustomization files are located within the above repo. Flux can then begin to constantly monitor any changes made to these files and apply them to K8s.
5. In the flux-documents/clusters/my-cluster folder, create a file called
gitops-demo-kustomization.yaml:
gedit gitops-demo-kustomization.yaml
6. Add these lines to that file. (You can also get the file from
~/LabFiles/gitops-demo-kustomization.yaml):
apiVersion: kustomize.toolkit.fluxcd.io/v1beta2
kind: Kustomization
metadata:
  name: gitops-demo-webapp
  namespace: flux-system
spec:
  interval: 5m0s
  path: ./flux-config
  prune: true
  sourceRef:
    kind: GitRepository
    name: gitops-demo-webapp
  targetNamespace: default
Main settings in this file are:
| Key name | Explanation |
| spec/sourceRef/name | This is the name of the GitHub repo we have defined in the previous step. |
| path | The folder within the application repo where the kustomization files are located. Recall that in our gitops-demo-webapp repo we had created a folder called flux-config to store the kustomization files. |
7. Save and close the file.
Part 6 – Deploy the Application
To deploy the application we need to push the YAML files created in the previous part. Once we do that, Flux will know about the Git repo of our web application and pull the deployment files from there.
1. Commit and push the YAML files that are in the application’s repo. Don’t forget to use your GitHub PAT for the password when asking for user and password:
cd ~/flux-documents
git add .
git commit -m"Add gitops-demo app info"
git push
2. It takes a few minutes for Flux to poll GitHub and detect the changes we just made. We can watch for the synchronization process by running this command:
flux get kustomizations --watch
After a few minutes you should see the success message:
“Applied revision: main/###”
3. Exit the flux command by hitting Control+C.
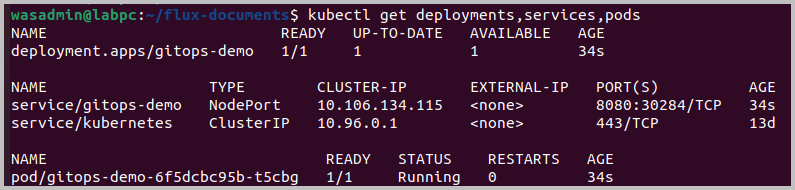
4. Run this command to verify that our application’s deployment, service and pod are all running successfully. The status of the pod being the most crucial since that is where our application is physically running:
kubectl get deployments,services,pods
You should see something similar than this, pay attention to the pod:
Part 7 – Test the Application
1. Run this command to find out the endpoint URL of the application:
minikube service --url gitops-demo
You should see the URL. The URL may be different for you!
2. Run curl command with that URL and by adding “/hello” to the end. For example:
curl http://192.168.49.2:30284/hello
You should see this reply.
{"requestCount":1,"greeting":"Hello!"}
Congratulations! You have deploy the application in Kubernetes in the GitOps way.
Part 8 – Change Management
Let’s make a change to our application’s deployment. So far we are running the application out of a single pod. Now we will configure 4 replicas.
1. Open gitops-demo-webapp/flux-config/deployment.yaml in an editor:
cd ~/gitops-demo-webapp/flux-config/
gedit deployment.yaml
2. Change the replicas property to 4 as shown in bold face below:
apiVersion: apps/v1
kind: Deployment
metadata:
  creationTimestamp: null
  labels:
    app: gitops-demo
  name: gitops-demo
spec:
  replicas: 4
  selector:
3. Save and close the file.
4. Commit and push changes:
git add .
git commit -m"Use 4 pods"
git push
5. Run this command to wait for the changes to be picked up by Flux and applied to the cluster:
flux get kustomizations --watch
6. After a minute exit the flux command by hitting Control+C.
7. Finally, verify that 4 pods were created for our application. They should all be in a healthy running state:
kubectl get pods
You should see the 4 pods:

Part 9 – Review
The GitOps way of doing things certainly takes a few extra steps. But the benefits should
be clear to you:
- Now every change made to the cluster is version controlled. In case of this lab,
the core Flux settings are kept in the flux-documents repo. Application specific
settings are kept in it’s code repo gitops-demo-webapp. - Very few users now need login access to the K8s cluster. Most changes can be
made by pushing YAML files to one of the two repos used