Can you use a custom domain name with Azure? This is a question I often get asked when presenting Azure resources such as Web Apps.
Many resources in Microsoft Azure have a predefined domain name. For example, creating a Web App named learnix would then have the domain name learnix.azurewebsites.net

This domain name may be fine for a test site, but for production, a custom domain, such as learnix.ca would be preferable for production use.
Let’s walk through the assignment of a domain name for our newly created learnix Web App. Caveat: since the Azure Portal changes regularly, be aware that some of the steps and screen captures may have changed since publication of this article.
Selecting the right App Service plan
Any App Service plan allows the use of a custom domain, with the exception of the free tier. Even the Basic service plan allows for custom domains.
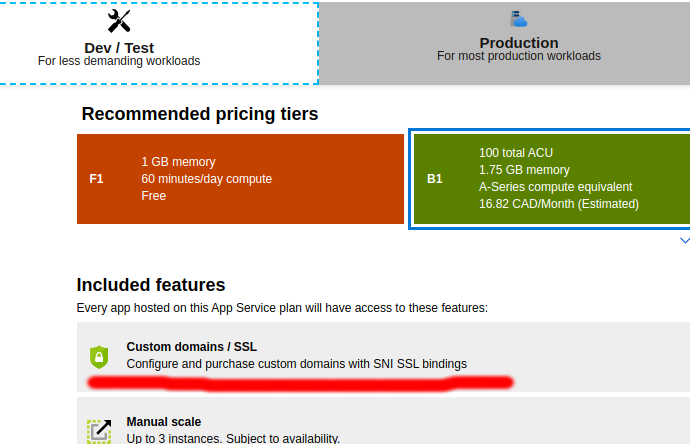
Note that it is possible to change an App Service plan from free to basic–or any other plans–even after the Web App is created. Use the Scale Up (App Service plan) from the resource menu.

Register a domain name
This section discusses registering a domain name. If you already have a domain name, you can skip to the next section.
Before setting a custom domain name to a Web App, a name must be registered from a domain name registrar. There are many domain name registrars available, including Microsoft. If so desired, it’s possible to register a domain name right from the Azure portal.
To register a domain name using the Azure Portal, let’s go in Custom domains using the resource menu.

Towards the bottom of the working pane, you’ll notice a buy domain button. Click on it.
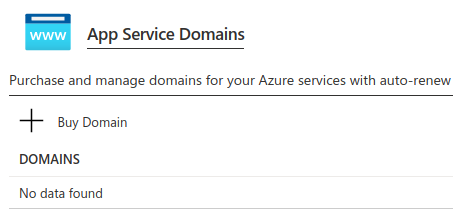
Type in the domain name you would like to register (or part of it) and press ENTER. Azure will suggest domain names that are presently available. Note that the domain name you would like to register may not be available. Feel free to try different variation of the domain name you would like to register until you find something that works for you. You won’t be charged anything until you click OK.

Following the selection of the domain name, you will be required to provide contact information, select your level of privacy protection and accept the legal terms.
Azure also offers the choice of assigning default host names for www and the root domain. Not a bad idea to select those but those can be changed after the order is passed.
Clicking OK will then place the order.
Be careful! No confirmation screen will be presented and the order is placed right away.
Congratulations! You’ve registered your domain name.
Assigning domain name to Web App
The following steps are necessary if your did not register the domain name from the Azure Portal.
If necessary, select Custom domains from the resource menu. The top-left of the working pane displays an IP address and a Custom Domain Verification ID. That information will be necessary to adding your domain to your Web App.
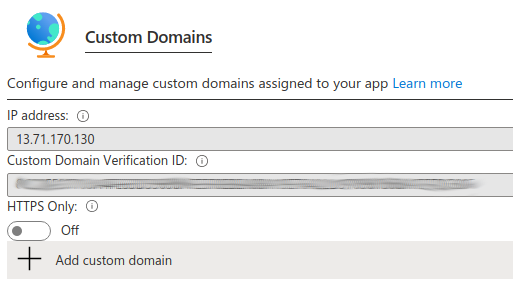
Click the Add custom domain button. The Add custom domain blade comes up.
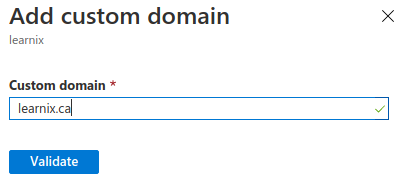
Type in your registered domain name and click Validate. The blade should expand as follows:
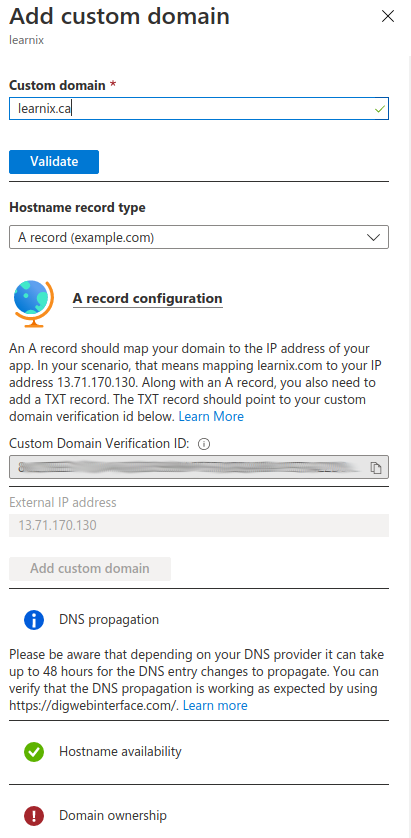
Notice the error message at the bottom of the blade: Domain ownership.
There are two things that must happen to successfully assign your domain name with your Web App.
- Configure your domain’s DNS servers
- Prove to Azure that you own the domain
We will fulfill both requirements by configuring the DNS server of our domain. The actual steps to configure a DNS vary from registrar to registrar but the concepts remain the same.
Let’s configure our registrar for learnix.ca. If necessary, delete all existing DNS records with your registrar and create the following records, as provided at the very bottom of the blade.
You don’t need to delete every records, but at a minimum, delete all existing A records.
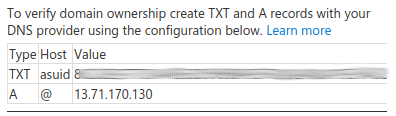
Here is a sample configuration:
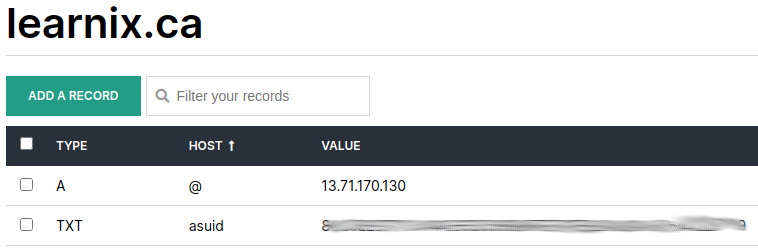
The asuid TXT record is used by Azure to verify ownership of your domain.
Once done configuring the DNS record with your registrar, return to the Azure portal, and click the Validate button on the Add custom domain blade. If everything goes well, your domain is now registered with your Web App.
If you closed the blade, simply re-open it, enter your domain name again, and click Validate. On successful verification, both the Hostname availability and Domain ownership have a green checkmark.
Note that it may take up to 48 hours before the changes at your registrar are propagated through the internet.
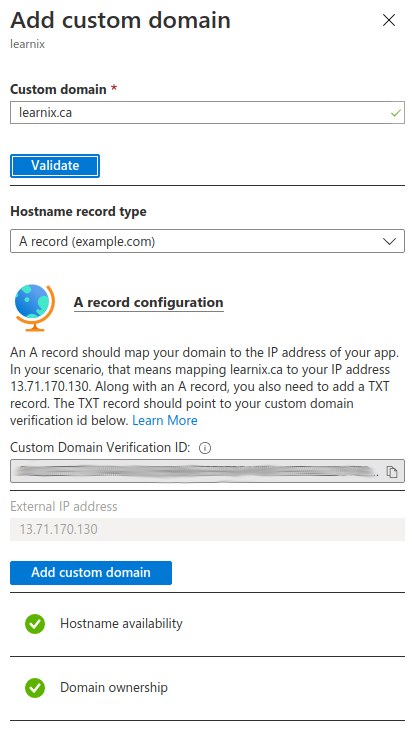
Click the Add custom domain to complete the operation.
Congratulations! Your own domain name is now bound to your Azure Web App.

The site supports HTTP but not HTTPS yet. Your next step will be to provide an SSL certification. But that will be a discussion for another post.